The keys to going digital
Incorporating digital photography into your office is an important step toward upgrading your practice and your bottom line.
Kevin Lesnewski
Digital photography holds tremendous promise for today`s practice. High-quality digital cameras offer the same key functionality as conventional film cameras: They enable dentists to photodocument patients` treatments.
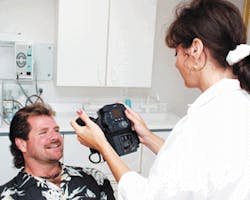
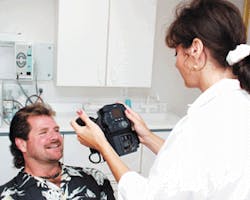
But digital photography offers other significant advantages. Digital cameras allow images to be viewed immediately, as well as help the dental team with creative patient consultations. Dentists can photograph a patient`s smile, perform a virtual procedure like whitening or straightening, and print out "before-and-after" images. This alone makes digital photography an unbeatable tool for patient presentations.
Fast image production also helps dentists work better with their labs. A dentist can print out a photo of a patient`s teeth, compare it to the patient`s teeth, and know he or she has an accurate color match for mailing to the lab.
Digital photography also makes it easy to distribute images electronically. More and more labs soon will be equipped to accept digital photographs electronically for specifying work like crowns and bridges. Increasingly, digital images will be used for referrals to surgeons or for filing insurance claims.
Images in digital form also are easier to assemble for lectures or presentations. Dentists can incorporate patient images into professional presentations, using off-the-shelf software applications like Microsoft PowerPoint. Presentations can be stored on portable computers or rewritable CDs. CDs are reliable and compact - each disc holds 650 megabytes of data - and today`s CD writers are priced very reasonably. Traveling with a jewel case and a portable computer is much simpler and less risky than carrying several trays of expensive and valuable slides.
For these reasons, digital photography is likely to become a key imaging tool for most dental practices. Does it sound like a tool you want to try? Here are some things you should know about digital-photography technology, so you can choose the camera that is right for you.
The same, but different
One of the great things about digital-image capture is that much of the technique - such as lighting, exposure settings, and attention to factors like room color - is the same as conventional photography. But the technology behind the cameras is very different, and that means dentists who switch must negotiate a learning curve. Using digital photography also requires software, and picking the right software is as important as picking the right camera.
Hardware
For dentistry applications, two key elements to consider are the digital camera`s ability to capture color and image resolution.
Digital cameras capture light using a sensor or CCD (charged coupled device). CCDs are light-sensitive silicon chips. Each "point" on the chip capable of detecting light photons is called a pixel. Typically, each pixel is built to record one of three colors - red, green, or blue - meaning camera manufacturers build CCDs using a mix of red-sensitized, green-sensitized, and blue-sensitized pixels. A single pixel can only record a given amount of information. The more information it can record, the more color-accurate - and expensive - the camera will be.
The amount of data each pixel can record is expressed in bits. For dental applications, the minimal specification is an 8-bit camera. That is a "full-color" camera where each pixel can record eight bits of data. To understand how 8-bit cameras get this designation, let`s start by doing a little math. A single bit is a record of one of two values: 0 or 1. You also can think of it as on or off. To calculate the total number of colors that 8-bit pixels can record, you multiply 282 to get 256. Since there are three sets of pixels (red, green, and blue), you then multiply 2563 to calculate the total number of distinct colors an 8-bit camera can capture - 16.7 million.
To understand why this is significant, it`s helpful to use an analogy. Imagine building an image of an apple using buckets of paint. Each bucket holds paint in one shade of red, green, or blue. For each point on the apple, you can use a single combination of any one shade of red, green, and/or blue. Now imagine if you had only three buckets of paint. Your choices are limited to one shade each of red, green, and blue. In this case, your apple will be built using a maximum of 27 distinct colors.
Now imagine you are using full color with 256 distinct shades of each of your three colors. It is truly an exponential jump to build the image using 16.7 million distinct colors. Clearly the more buckets of paint shades you have, the more true-to-life your image will be.
Resolution is another measure of digital-camera quality. For professional use, it is best to choose a camera that captures images of 1 million pixels or more. Cameras with at least 1,000-by-1,200-pixel resolution capture enough data to display the image on a standard color monitor without a "ragged-edge" look to the image. Images of this resolution also will look great printed out at snapshot size, or even enlarged up to 8-by-10 inches.
When evaluating digital cameras for color and image resolution, it`s important to note that manufacturers have two choices: They can build their cameras using hardware capable of capturing images at a particular resolution, or they can use cheaper hardware and then manipulate the captured data with software.
For example, manufacturers can start with a 6-bit CCD, then use a software algorithm called "data interpolation" to process captured images. This software essentially "guesses" about data it didn`t capture, then uses the generated data to enhance the image. This strategy lets manufacturers claim to offer 8-bit cameras, while using inferior hardware.
The same holds true for CCD size. A manufacturer might build a camera with a CCD that measures 600-by-800 pixels, then interpolation software is added to generate higher-resolution images.
So how do you know whether a digital camera is truly using a high-resolution sensor? Look at the technical specifications in the manual. If the resolution is identified as "interpolated data" (look for an asterisk next to the resolution information), then the manufacturer is using software to deliver a higher resolution than the camera actually captures.
Other hardware features dentists should look for include camera mechanics. Dentists need a camera that supports fast shutter speeds, which will help avoid image-blurring due to patient movement. Some digital cameras offer LED displays, so images can be previewed as soon as they are captured. This ensures the image is framed properly. If not, the dentist can retake the shot.
Another critical element is the lens. Dentists should choose a camera that takes optical close-ups. Some cameras come equipped with an extended optical zoom, while others let you add accessory diopters later (just as you can change lenses on a quality 35 mm film camera). Although they might be cheaper, digital cameras that offer magnification through postcapture software-processing will not give you the same level of image quality.
Finally, the digital camera should support external synchronization of a ring flash. Look for a camera with a port for a flash cable.
Software
Since time is money, another way to measure a digital camera`s value to the practice is how user-friendly and useful the software is. Most dentists probably don`t want to have to become computer programmers to use their digital cameras. Ideally, look for a camera that comes integrated with software designed for dental applications. A graphical interface is great because "pointing and clicking" is a familiar and straightforward way of navigating software. The menus and commands should use familiar terminology.
The software should support at least three basic applications: viewing the images, storing them, and simple editing such as cutting and pasting.
Some of today`s dental-imaging applications also sport sophisticated functions - such as automated whitening and reconstruction simulations - that can really enhance your digital photography. Remember, the more the software is programmed to do automatically - like size a tooth you`ve selected to drop into an image of a patient`s smile - the less time you will spend manually editing images on a computer screen.
For storing images, most practices will use a patient database for short-term storage. This can reside on a desktop computer or network server hard drive. Remember to plan for adequate storage space. Consider how many images will be taken of each patient, and how many patients are being served by the practice at any given time. Many practices will find a database capable of managing 30,000 images to be satisfactory.
For long-term storage, consider writing the images to CD-R media. CD-R has been shown to be an archival quality image storage medium, lasting a minimum of 100 years under normal storage conditions.
Don`t forget photographic technique
As I mentioned earlier, much of the photographic technique required to take quality images is the same for both conventional and digital photography. Here are some basic procedures that help ensure good image quality, regardless of whether you use a film or digital camera.
Standardize your image-capture procedures. By eliminating variables in the image-capture procedure - such as the position of the subject - the images will be a more accurate record of patients` progress.
Eliminate distractions that might clutter the image. Prepare the image in such a way that the eye will be drawn to the intended subject. The goal is a clean image that focuses on the object of interest alone.
Be aware of reflected color. Rooms that are painted pink, yellow, and/or blue can cause those hues to be reflected onto the subject. This can, in turn, warm or cool the image`s true colors. It is best to take the photograph in a room that is decorated with more neutral colors, such as tan, beige, gray, or white.
Place something in the picture that can be used as a size reference. For example, put a small ruler next to the object of interest.
Use proper lighting. The photograph should be artificially lit. Use a ring flash for best results.
Check exposure settings. For digital photography, it is better to underexpose the image slightly rather than to risk overexposure. If a digital image is overexposed, some detail in the highlight areas will be lost.
On the other hand, a slightly underexposed image will capture information in both the shadows and the highlights, and will be a more complete photographic record. Therefore, it`s good practice to underexpose the image by 1/4 to 1/2 of an F-stop. The color saturation and detail of the final image will be better. If the final image is slightly dark, it can be "corrected" during processing or viewing.
Digital cameras offer substantial benefits to today`s practice. If you choose the right camera and software - and practice good photographic technique - digital imaging can be a reliable and dynamic patient-education tool that will help you build your practice.
For digital photography, it is better to underexpose the image slightly rather than to risk overexposure.

