Cementing porcelain laminate veneers
Thanks to new technique developments and product advancements, the placement of all-ceramic veneers has evolved from a time-consuming process to one that makes it easy for dentists to produce long-lasting, esthetically pleasing results. Preparing both the teeth and restorations for cementation includes a number of steps in addition to the meticulous and often tedious removal of excess cement and cleanup of the marginal areas. By using a cement that is easy to dispense and apply, has an optimal viscosity level to limit drifting after seating, is easy to remove and clean up, and has long-term color stability, dentists can complete the procedure in less time while still delivering high-quality, natural-looking restorations. This can save time, satisfy patients, and provide opportunities for increased profitability.
For a long time, veneers have been considered by many - including myself - to be one of the most conservative, longest-lasting, and best-fitting ceramic restorations in dentistry. Choosing the proper resin-cement system for veneers is a critical step for success. In the 17 years I have been seating veneers, materials and techniques have come a long way. Before the availability of water-soluble try-in gels, a try-in for color choice of the cement was done with the resin cement itself. The steps involved to clean off the resin from the internal etched surface of the veneer and reprepare that surface for cementation were time-consuming. The introduction of Prevue™ water-soluble, non-light-activated try-in gels by Cosmedent in the mid-’80s allowed us to select a color of the resin cement without adversely affecting the etched surface of the porcelain, thereby saving chair time.
A handful of systems available today give practitioners color-corrected, water-soluble try-in gels, optimal viscosity levels, and color-stable resin cements, opaques, and color modifiers. Not all systems are all-inclusive (i.e., opaques, color modifiers, dual-cure catalyst, etc.), and practitioners must decide which system or systems work best for them and their patients. My systems of choice include Insure Universal Cementation System™ from Cosmedent and RelyX™ Veneer Cement from 3M ESPE. The Insure system is the only system with light-curing, dual-curing, and self-curing capability and high chroma color modifiers. The RelyX Veneer system was the first light-cure-only cement designed for the special needs of veneer cementation. Both systems have opaque shades and color-corrected, water-soluble try-in gels to coincide with the resin cement.
It is not my intention or field of expertise to cover the chemistry of the cements, but to share my own clinical experience and what I believe to be a good understanding of the materials discussed. It has been documented in the literature and observed in my practice that all resin cements have the potential to experience less than a half- to a full-shade color shift over time, depending on the system. There have been past concerns and claims that the two-paste, dual-cure systems had color instability over time when used as a single paste because of the unreacted components that cause the color shift. This supposedly happens when the catalyst components do not react with the base components. I have never used the dual-cure catalyst with veneer cements because of the combined thickness of the restoration and cement allows for complete polymerization of the cement. I have used Insure cement since the mid-’80s, and any noticeable color shift over time most likely can be contributed to operator error (i.e., under-reduced preparation of dark teeth, minimal opaque shade, expiration date, etc.). For veneers, Insure cement is recommended to be used as a one-paste system. The light-cure-only systems, such as RelyX Veneer Cement, also lay claim to long-term color stability because of only a one-paste component.
When combined with new curing techniques, advanced resin-cement systems that provide an ideal viscosity level, such as RelyX Veneer Cement and Insure cement, allow dentists to initially place the veneers, then remove excess cement from the gingival and interproximal margins before final polymerization, without the veneers drifting. The Tack & Wave technique developed recently by Dr. David Hornbrook with RelyX Veneer Cement involves using the smallest-diameter light tip, then following with a larger diameter light tip that is waved about an inch above the margins for an additional one to three seconds, depending on the light source.
Using this technique to seat multiple veneer restorations at one time has become popular with some dentists. Nevertheless, in my opinion, it is not the technique of choice with most dentists. I do, however, seat multiple full-coverage, all-ceramic restorations at one time using the Tack & Wave technique.
I recommend seating two veneer restorations at a time, starting with the central incisors and then in pairs moving posteriorly, regardless of the cementation technique. This adds little to the overall time of the office visit and reduces the chances of costly and time-consuming replacements because of improper seating.
Cementation technique
The following technique, which I picked up from Dr. Robert Nixon in the late ’80s, will detail the procedure I have successfully used in my practice when cementing porcelain laminate veneers. The procedure illustrated can be used with most veneer-cement systems, but it is recommended to follow the manufacturer’s instructions. The Tack & Wave technique with RelyX Veneer Cement modifies the polymerization and cleanup step and reduces the time involved with this step.
Magnification always should be used for procedures we do in our offices.
Step 1)
The veneers should be evaluated on the laboratory model for proper seating and marginal adaptation.
Step 2)
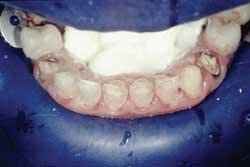
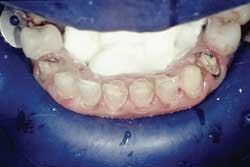
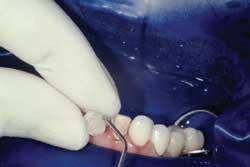
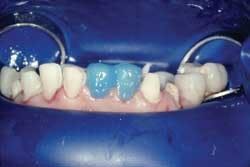
Rubber dam use is critical on mandibular teeth to isolate the lip and tongue and control moisture. Vanilla Bite (Discus Dental) was used to seal the lingual area (Fig. 1). Rubber dam use is also recommended for maxillary teeth. The preparations were cleansed with ConsepsisScrub (Ultradent) and a prophy cup (Fig. 2).
Gingibraid Oe (Van R) retraction cord was placed where the margins were at or below the crest of tissue.
Step 3)
The veneers were tried in individually to ensure proper seating and marginal adaptation (Fig. 3).
Then, all at once with a water-soluble, try in paste (Prevue Yellow Red Light, in this case) to verify the shade and check the interproximal contacts (Fig. 4).
A Vivastick (Ivoclar Vivadent) often is used to transport mandibular veneers into place (Fig. 5).
Check the interproximal contacts of each veneer with either a thin strip of Accufilmor liquid AccufilmIV (Parkell). If the contacts are slightly tight, you will have an improper seating of the veneers and even potential for fracture of the porcelain trying to seat the veneer in place. This is the main reason I feel more comfortable seating only two veneers at a time. With this particular case, the color was predetermined from the maxillary porcelain. A shade match with try-in gels usually is done without the rubber dam in place.
In my practice, translucent cement provides the best esthetic shade 90 percent of the time. The remaining 10 percent either need an opaque shade blended with the translucent or a different base shade.
Step 4)
The matching resin shade is selected. The veneers are removed and the try-in gel is rinsed out. I prefer to use phosphoric acid for five seconds on the etched surface of the veneer to clean it. Then, I rinse and dry it. RelyX Ceramic Primer (3M ESPE) is placed for one minute. Two coats of Adper™ Single Bond Plus Adhesive (3M ESPE) are applied to the primed surface, thinned out, and left unpolymerized. After selecting the Insure shade to match the Prevue try-in gel used (Fig. 6), the resin cement is dispensed into a Resin Keeper (Cosmedent) along with the veneers and covered.
Step 5)
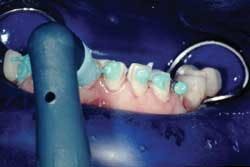
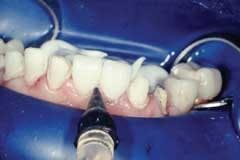
Seating the central incisors first, the teeth are etched with Scotchbond™ 35 percent phosphoric etchant for 10 seconds (Fig. 7), rinsed, and lightly dried, leaving the dentin moist.
If adjacent proximal surface is near or in contact, cover with small strips of Dead Soft Matrix (Denmat) to prevent from etching the surface. Two coats of Adper Single Bond Plus Adhesive are applied, thinned out, and left unpolymerized.
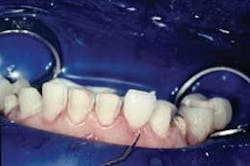
The resin cement is placed inside the veneers, and they are seated onto the preparations. With the smallest diameter tip (2mm) and the Optilux 501 Curing Light (Kerr), the veneers are tacked for five seconds in the middle third. Avoid polymerization of the margins or the cleanup of excess cement will become more time-consuming. Using a rubber-tip stimulator, microbrushes, and Glide dental floss, remove excess cement along the margins (Fig. 8).
The placement of a glycerin gel such as Oxygone™ (Cosmedent) along the entire margin will eliminate the oxygen-inhibited layer during polymerization. With a large diameter tip and the Optilux 501 Curing Light, each surface is polymerized for 40 seconds.
Step 6)
In my experience, this technique and the Tack & Wave technique leave minimal excess cement.
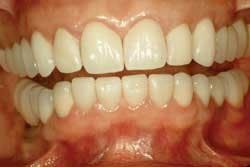
The excess cement is removed with a Bard Parker 12B scalpel blade. Minimal polishing is done with Sof-Lex™ Extra Thin Superfine Discs (3M ESPE) and Flexibuffs™ with Porcelize polishing paste (Cosmedent). The remaining veneers are seated in pairs following the same protocol (Fig. 9).
These steps have worked well for me in my practice. The halogen curing lights have withstood the clinical tests of time. Time will tell if the LED curing lights, with shorter curing times, will be as successful. While some dentists may feel comfortable seating multiple veneers at one time, my concern is improper seating and marginal adaptation that may be affected by tight interproximal contacts, drifting of the veneers, or both. By seating two veneers at a time, the clinician can make certain the restorations are completely seated the first time, reducing the likelihood of costly and timely replacements. I usually schedule approximately 15 to 20 minutes per veneer, depending on the patient. For example, if it is a maxillary, lingual-wrap veneer cemented with the Tack & Wave technique and using an LED curing light, it takes less time. The majority of time is spent trying in the veneers and preparing for the actual cementation.
With proper preparation design and cementation techniques, dentists can provide patients with one of the best-fitting, longest-lasting, esthetic porcelain restorations available. Profitability often can be measured by a satisfied patient’s smile and time-saving procedures.
Dr. Wes Urichgraduated from the University of Minnesota School of Dentistry in 1983. He maintains a private practice in the Minneapolis area with a focus on comprehensive esthetic, restorative, and implant dentistry. An accredited member of the American Academy of Cosmetic Dentistry, Dr. Urich also serves on the American Board of Cosmetic Dentistry of the AACD and is an accreditation examiner. He is a founding member and past president of the Minnesota Academy of Cosmetic Dentistry and has shared his knowledge in a variety of lecture and hands-on venues. Reach Dr. Urich at www.StylishSmiles4U.com.
