Accurate dies and well-fitting crowns using THREE-IN-ONE, all-plastic impression trays
Marc Gottlieb, DDS
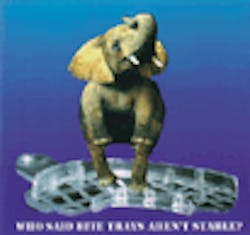
Over the past two decades, impression materials have improved, but impression-tray design has been ignored. Every dentist eventually develops a specific technique for taking crown and bridge impressions. Whether you take a hydrocolloid, copper-band, full-arch, quadrant or triple tray impression, the goal is to have accurate dies and well-fitted castings. What I was able to demonstrate is that accurate castings can be made using an all-plastic, three-in-one tray. Figure 1 is an illustration of an elephant on a three-in-one tray, mocking the belief that three-in-one trays are unstable.
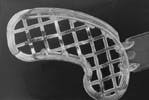
Three-in-one impression techniques allow the dentist to record the counter model at the same time as the final impression of the prepared tooth. This procedure saves time and the cost of impression material. The first step to any accurate impression is to size up and try the tray into the patient`s mouth. Most three-in-one trays (Affordable Dental Products) are available in anterior, full-arch and quadrant styles (Figure 2 shows the three most common shapes and sizes). Select the smallest tray that can be placed easily into the mouth and that extends two to three teeth beyond the preparation. If needed, the all-plastic, three-in-one trays can be modified using a heavy scissor. The tray then is placed into a bowl of 140-degree F "hot" water for 30 seconds (Figure 3). This will soften the plastic. The patient then is coached into centric occlusion and rehearsed until the patient can bite repeatedly into centric occlusion and the tray sits passively in the mouth (Figure 4).
Make a mental note as to the position of the tray handle in relationship to the incisors to facilitate insertion of the loaded tray over the prepared tooth or teeth. Upon removal from the mouth, the tray should be rinsed off with cold water and appear distorted. This distorted tray is stable and now customized for easy placement back into the mouth (Figure 5 shows the distorted tray). All-plastic trays have a plastic mesh as thin as gauze, which reinforces the tray and prevents lateral movement. The gauze found in most three-in-one trays can behave like a sponge and soaks up bloody contaminants and/or the impression stone affecting the final impression`s accuracy.
After the tray has been customized and rehearsed in the patient`s mouth, I pack a small piece of 3-0 black silk suture (Johnson and Johnson) material once around the tooth. If gingival bleeding is present, I will presoak the suture material in Lidocaine with 1:100,000 epinephrine. This provides adequate hemostasis with minimal cardiovascular effects (Figure 6 shows 3-0 black silk suture material and 2-0 retraction cord-Cutter Cord, Miles- soaking in 1:100,000 Lidocaine with epinephrine). Once the suture material is in place, either plain 2-0 retraction cord with aluminum sulfate or epinephrine is placed over the black suture material. I prefer the plain cord in older or medically-compromised patients. The cords are left in place for approximately 10 minutes.
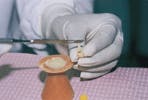
After the cord is packed into the sulcus, I place a block of temporary acrylic over the preparation and ask the patient to close into centric occlusion. When the block of acrylic is removed from the mouth, it is rinsed off with water, sprayed with a disinfectant and then allowed to harden in a cup of water (Figure 7). The cup of water slows down the exothermic reaction of the setting acrylic and reduces any dimensional changes. The block then is trimmed and the internal aspect reamed out. After the impression (Permadyne, ESPE) is removed from the mouth, the thinned, roughly-shaped, temporary crown is relined with additional acrylic and once again placed into the cup of water (Figure 8). A well-fitted temporary crown is critical to easy insertion of the final crown.
Using a conventional, light-bodied impression material (Permadyne, ESPE), I will remove the first layer of retraction cord, rinse, dry and syringe the material into the sulcus of my preparation. At the same time, my assistant is mixing and loading both sides of the three-in-one tray with a heavy-bodied impression material (Figure 9 shows the light- and heavy-bodied impression materials-Permadyne, ESPE-next to each other). I then place the tray into the patient`s mouth, using the handle and anterior incisors as reference points, and seat the loaded tray over the preparation and instruct the patient to close down slowly and remain closed until the material completely sets. While the material is settling, I will check the intercuspation on the opposite side of the mouth. If the patient did not close into centric occlusion, I will keep the patient in that position and instruct the laboratory technician to pour each side separately and hand-articulate the models. The impression is allowed to set and then gently teased out of the mouth with vertical pressure on both sides of the tray around the preparation. I only use the handle for placement since horizontal movement of the tray can tear the impression material at the thin gingival margins. Once the tray has been removed from the mouth, it is rinsed off, disinfected and inspected for voids, bubbles and confirmation of intact continuous material at the gingival margins.
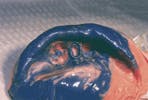
In order to prove that the all-plastic, three-in-one trays are clinically accurate, I selected 10 patients who needed single-unit, upper-bicuspid crowns. The reasons why upper bicuspids were selected were the rapid and predictable onset of local anesthesia, easy access to the gingival sulcus for cord placement and patient comfort. All 10 patients had a three-in-one impression taken as described above and then a second impression taken with a conventional, quadrant impression tray, using the same light- and heavy-bodied impression material (Figure 10 shows a quadrant impression on the left and Figure 11 shows the three-in-one impression of the same tooth on the right). All of the impressions were poured in pink die stone and ditched. Five crowns were made from the quadrant impression and the remaining five crowns made from the three-in-one impression. I could not see any clinical difference in the fit of the crowns in the patients` mouths or how they fit the dies. Figure 12 demonstrates how well the casting fit on the dies, regardless of which impression tray was used.
Only accurate, error-free impressions were used, and, in every case, the counter model was hand-articulated.
With the economic pressures of running a practice, many dentists rely on their sales representative or articles in professional journals when purchasing new materials or trying a new technique. This is a good beginning, but once in a while we must do our own controlled experiments. I found that by softening an all-plastic, three-in-one impression tray in hot water for 30 seconds, I was able to obtain accurate dies and well-fitted crowns.
Figure 1
Figure 2
Figure 3
Figure 4
Figure 5
Figure 6
Figure 7
Figure 8
Figure 9
Figure 10
Figure 11
Figure 12
Figure 13
About the Author
Dr. Marc Gottlieb has general practices located in Levittown and Smithtown, NY, which emphasize dental care for the apprehensive, utilizing everything from tender loving care to general anesthesia. He earned his dental degree from the University of Buffalo in 1982. While an undergraduate, he was a research assistant to Drs. A. Drinnan and T. Thines. Upon graduation, he entered a postgraduate, general-practice residency program at Long Island Jewish Medical Center in New Hyde Park, NY, where he went on to earn a certificate in dental anesthesiology. Dr. Gottlieb currently is affiliated with Long Island Jewish Medical Center and Queens Hospital Center in New York. He may be reached at (516) 796-6600 or by writing to 3601 Hempstead Turnpike, Suite 420, Levittown, NY 11756.


