Taking your practice to the next level
by Jack D. Griffin Jr., DMD, MAGD
Cosmetic dentistry has changed our profession forever. Advancements in education, materials, and techniques have expanded our choices in care as well as changed patient attitudes toward dental care. Patients now have a great sense of cosmetic awareness and an acute sense of what they want. These are unprecedented times in our profession, and the pressure is on to provide care that meets the patient's vision.
Because of all of this, we must be on top of our game when it comes to providing cosmetic services. It is critical to be organized, confident, and competent in our esthetic endeavors, whether doing esthetic procedures everyday in a cosmetic-minded practice, or for those just beginning to focus on esthetics. The following is a systematic approach to consistent success in esthetics, regardless of perceived skill or experience level.
1. Create an esthetic environment
“I came to the right place … this is where I want my cosmetic work done!” When patients walk into our office and meet the staff, we want them to be confident in our ability to satisfy their needs and be comfortable in their decision to improve their smiles in our office. Patients are well informed about cosmetic dentistry with Internet research, magazine articles, and advertising. They come prepared. They notice and scrutinize our preparation, organization, and methodical attention to detail. Office clutter, chaos, and carelessness are turn-offs to the quality-seeking patient.
We have no Beverly Hills or Manhattan practice, but patients can see that we feature esthetic dentistry from our wall gallery, computerized office portfolio, and staff members who are always eager to show our work (Fig. 1). It cannot be emphasized enough that the staff is as critical in cosmetic case acceptance as any other persuasive component. When they show patients the finished cases they helped to create, the enthusiasm is transferred to the patient (Fig. 2). We want the staff to say, “Look what we did!” That in itself is our number-one case closer in this practice.
2. Learn from the masters
We are dentists — we have a license to drill. However, before laying a bur to a tooth, we need to have a clear idea of what materials, procedures, and techniques we'll need to be successful. This comes from experience, training, or a mentor. There are more courses, continuums, webinars, institutes, and journals promoting esthetic education than in the history of dentistry, so acquiring knowledge is easy.
Let someone else make the mistakes and have the headaches of trial and error, then learn from them. It's seldom about anything new at this point, rather it's about taking what works for others and melding it into a system that succeeds in your hands. Acceptable esthetics in today's world is far from slapping some porcelain on teeth. Combining perio, occlusion, materials, photography, tooth preparation, and lab excellence with patient management is the key to acceptable treatment and happy patients. Seeing what does and doesn't work for other skilled practitioners can build confidence and form the mental framework for our case success.
3. “Say cheese”… do excellent photography
Marketing is the process of getting patients to want the dentistry that we like to do. Quality images are instant credibility. It's not about making the whole world a bleach shade or insisting that everyone needs veneers; it's about stirring patient desires, stimulating them to take action, and showing them we can achieve the results they want. This is a key in increasing the number of cosmetic cases.
There are many photographic “series” formats to choose from. The key is to be consistent with the images and choose a series that fits your needs. We never get a second chance to take pre-op images, so be consistent with your photography so that it becomes as important in treatment as radiographs or an exam.
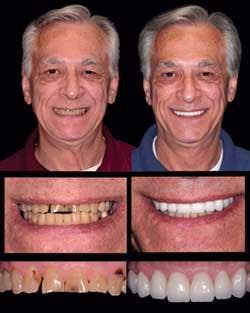
The office portfolio is the best way to showcase staff talents and transfer that excitement to the patient. These images should be consistent throughout all aspects of patient education and marketing: wall art, album portfolio, consult-room PowerPoint slides, operatory monitors, Web site gallery, and external advertising. The portrait is the “emotional” stimulus that actually sells cosmetic dentistry (Fig. 3).
Photography is often regarded as merely a marketing tool, but the better your photography skills, the better your work will become. Seeing your own work on large monitors can be quite humbling and provide the stimulus to become better. Great photography is also the backbone for good communication with your lab technicians. We want them to experience the case with us, and photography can bridge that link between the lab bench and the treatment chair. This is described in the box below.
4. Visualize — know where you are going before you start
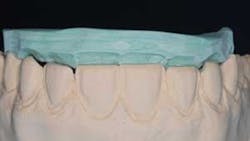
If you don't have a clear vision of a great finished case in your mind, don't prep. Our greatest source of information and confidence during a case often comes with the ceramist. Not only do they do these cases daily, experienced ceramists can help with needed preparation amounts, temporary matrix fabrication, and material selection. Use their advice, preparation guides, and experience to help you efficiently prep the case, which will reduce problems at insertion (Fig. 4).
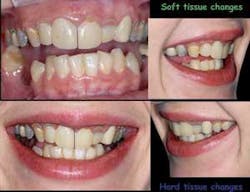
Before the prep appointment, take time to look at the pre-op digital images on a large monitor away from the normal distractions of the dental office. Print photos to display in the operatory during preparation, and use them like a builder would use blueprints during construction. These photos can be marked with desired soft- and hard-tissue preparations and placed in the operatory during treatment (Fig. 5).
5. Manage the patient
It's amazing how we all want to “graduate” from just regular old family/general dentists to “cosmetic” dentists — as if keeping the world in sound, healthy, able-to-chew-with teeth isn't enough. I am one of those family dentist types who has recession-proofed my practice by doing all types of dentistry. However, our two to four cosmetic-enhancement cases per week have provided our staff with the wonderful positive feedback this treatment can provide, while at the same time confirming over and over just how meticulously picky many of these patients can be (see box below).
It can be a daunting task to create beauty in patients' minds once advertising, the Internet, their friends, and their own visualizations have skewed what they see. It matters not that the margins are perfect, the anatomy is perfect, and the result is world class — if the patient isn't happy. Not meeting patient expectations can make for a miserable practice life. From the first cosmetic consult through delivery of the restorations, we are careful in our description and promises. We must exude confidence to patients while tempering expectations.
6. Lab communication is key: photos + models + feedback = great case
An experienced lab that understands esthetics is critical. Regardless of how great your case planning is, poor lab work will ruin the case. However, their artistry can never be better than the quality of work you send them. The lab should have experience with a variety of esthetic materials, and above all, be willing to discuss treatment options to optimize outcome. If they aren't willing to share ideas and experience with a cosmetic case, they may not be the right lab for the case. By the same token, a dentist with the attitude “I have the degree, how dare they suggest changing my plan” is self-centered instead of patient-centered. The best results are achieved by open communication and working together.
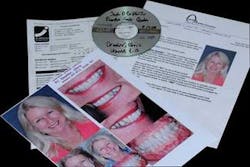
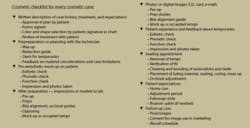
Obviously, void- and distortion-free impressions, accurate occlusal records, and excellent tooth preparation are needed, but we must be diligent in our case materials and consistent in what we send to the lab (Fig. 6). You cannot expect work back from the ceramist that is better than what you gave him or her. Allow an experienced technician to discuss things with you if preps, impressions, or materials requested would give a compromised result. Be consistent from case to case by providing them with excellent written descriptions of what you and the patient want (Fig. 7). Let them know what luting materials you plan to use and show them the mock-up, temporaries, and preparation shades (Fig. 8).
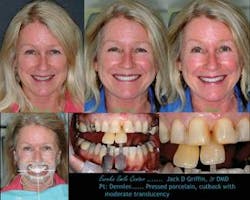
It is so easy to blame the lab for a failed restoration. We are quick to send them a re-make form and criticize their work, but when was the last time we told them “Great case!” and sent them photos? (See Fig. 9.) Allow them to bask with you in the glory of a great case — it may help the next time you ask for a “rush” on a veneer case or accidentally suck up a veneer in the suction.
By sticking to an organized sequence of treatment and keeping meticulous attention to detail, every practitioner can experience great rewards in cosmetic dentistry. What a great time to practice dentistry.
Jack D. Griffin Jr., DMD, FAGD, PC, practices in a busy high-tech practice that emphasizes cosmetics while doing all phases of modern dentistry. He has been honored by being published many times and asked to speak to many groups on digital photography, esthetic veneers, CAD/CAM restorations, practice management, and practice promotion. You may contact him via e-mail at [email protected].
Action items to create a cosmetic environment
- Keep office clean, fresh, and modern
- Have staff knowledgable and excited for esthetic care
- Wall art: portraits of cases the office has done
- Office portfolio: photo album, PowerPoint show
- Web site to impress and educate
Use of photos during a cosmetic case:
- Analysis of case — full series taken for pre-op record; studied away from operatory distractions to form operative plan, then reviewed with ceramist
- Pre-op lab communication — pre-op images allow ceramist to help plan the difficult case, review preparation needs, and help with material selection
- Patient consult — pre-op shown to patient to reinforce recommended treatment; large monitor will make patient more aware of cosmetic needs
- Treatment images — allow ceramist to “experience” case; photos of mock up, temps, bite alignment guide, prep shade
- Postcementation images — check for cement removal and places that need to be recontoured evaluate work for needed enhancements
- Postop images — Two to three weeks after final cement removal and adjustments, repeat pre-op series, analysis of techniques and materials, marketing
Management of the esthetically conscious patient:
1. Never imply “perfection,” “permanent,” or “exactly.” Instead, communicate that “we are working together to create a smile ideal customized for your teeth and face.”
2. Show the patient before-and-after cases that you and your staff have done, so there is no misconception of what can be done in your office. If you have an office portfolio in an album or PowerPoint show, let your patients point out the tooth characteristics they like most and use that as a “rough template” for their makeover.
3. Before treatment, encourage patients to help with shade selection (from photos of old cases, shade guides, etc.) and have them sign in their chart the shade they selected.
5. Stress that the provisionals are a basic and “rough” idea of what you are going for in the final restorations, and they are an important “trial” phase for the final restorations. Use a shade that is similar to the color chosen, and tooth shapes will be similar to what you are trying to achieve.
6. After cementation, stress to the patient that work is not finished. Further clean up, bite adjustments, and flossing will be done in one week.
7. Tell the patient that “Someone you are close to will say they are ‘too long,' ‘too white,' or ‘too straight' simply because they are used to seeing you with your old smile. Changes will take time for everyone to adapt to.
8. Inform the patient that we will make no changes to length or appearance for two weeks to allow time to adapt. Then you can adjust the porcelain slightly to alter length and shape if needed.
9. Most important, be positive. You and the staff need to tell the patient how good he or she looks. Remind them of how they looked before treatment by showing the pre-op photos and point out the changes that have been made.
null


