The successful mandibular denture implant-part two
W.F. Turbyfill, DDS
PART TWO - Summary of Last Month
Treating the edentulous patient successfully always begins with the construction of a diagnostic training denture. This is appropriate, whether planning a conventional denture, or if implants are anticipated or if implants already have been placed.
A Must
It is imperative that all removable prosthetics begin with the diagnostic denture. The fact that a patient has implants placed into the anterior mandible does not relieve the dentist from the responsibility of providing excellent esthetics, balanced occlusion in centric relation and a vertical dimension that does not restrict the normal activity of the muscles. The precision fit and processing of the bases is more important when dealing with implant-retained prostheses.
Figures 1-15 demonstrate how the diagnostic denture is used as a prosthetic guide to completing the mandibular implant-retained denture. It will provide accurate tooth placement, vertical dimension, centric relation and a custom-transfer impression tray.
Slide Legend
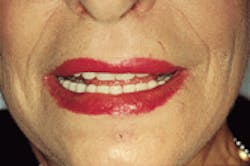
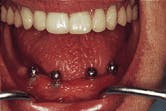
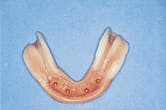
Figure 1-The patient has had four implants placed in the mandibular anterior segment. The denture is unsatisfactory to the patient in the three critical areas of esthetics, comfort and function.
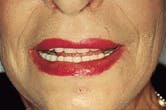
Figure 2-A diagnostic denture first is constructed if implants are planned or if the implants already have been placed. A diagnostic denture is constructed that satisfies the patient in the areas of esthetics, comfort and function.
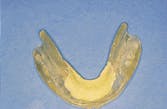
Figure 3-After the diagnostic denture has satisfied all of the patient`s needs for esthetics, comfort and function, a clear duplicate of the mandibular denture is constructed. These are very accurate duplicates, and the vertical dimension, centric relation and tooth position can be verified in the mouth. If the implants have not been placed, then this clear duplicate is used as the surgical guide.
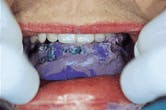
Figure 4-The hex transfer pins are placed. The clear guide is relieved if there is any contact of the transfer pins and the clear stint. The clear stint is impressed in the mouth with the transfer pins in position.
This impression is poured in a fast-setting stone and separated.
Figure 5-The transfer pins are covered with wax, making sure that the occlusal surfaces and the incisal edges are not covered.
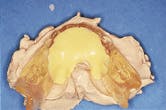
Figure 6-The wax now is covered with a self-cure tray resin, making sure that it will not interfere with the occlusal or incisal surfaces.
Figure 7-The result of this is that a custom impression tray has been constructed for the transfer impression and recording of the vertical dimension and the centric relation. This is a very accurate tray since it was constructed from the diagnostic denture with the functional impression in place.
Figure 8-The transfer impression of the transfer hex pins is being accomplished, and, at the same time, the centric relation bite is being registered as excess impression paste flows onto the occlusal surface.
Figure 9-The implant body analogs and the hex transfer pins are placed into the transfer impression.
The transfer impression with the analogs placed is boxed and poured with a good-quality, vacuum-mixed buff stone.
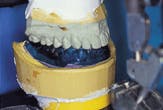
Figure 10-The transfer impression, along with its cast, is mounted to a cast of the completed maxillary denture. Before the impression tray is removed from the cast, grooves are placed onto the base and a stone core is made to register precise tooth position.
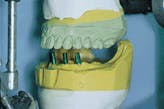
Figure 11-The master mandibular cast now is mounted accurately to the cast of the completed maxillary denture. It is mounted at the correct vertical dimension of occlusion, in centric relation, and the position of the anterior teeth is recorded.
The stone core that was constructed before the impression tray is removed from the cast. It shows the precise position of the mandibular incisors as they relate to the implant fixtures. It now is just a matter of designing the type of connection between the teeth and the implant fixtures.
Tapered abutments are placed into the analogs, and a duplicate set of teeth that were used in the diagnostic denture are set into the core. This tooth position has been tried, tested and proved. There is absolutely no guesswork.
The prosthetic teeth now are transferred to a base plate.
Figure 12-The final try-in is accomplished. The vertical dimension of occlusion, phonetics and centric relation are verified.
The remaining teeth are set to lingualized occlusion and the denture is waxed, ready to be processed.
Figure 13-The retention of the mandibular denture is accomplished by using four balls around which a permanent, soft liner is processed. The liner of choice for this purpose is Mollo-Plast B.
Figure14-The completed maxillary denture and the implant-retained mandibular denture.
Figure 15-The tissue surface of the mandibular denture that shows the soft liner and the free-end saddle reline impression. I believe that all free-end saddle partial dentures should be relined upon delivery. An implant-retained mandibular denture is a free-end saddle partial.
The completed dentures are inserted. The patient is extremely happy with all aspects of the prosthesis. The success of the case was not by chance; success was assured with the use of the diagnostic provisional denture.
Figure 1
Figure 2
Figure 3
Figure 4
Figure 5
Figure 6
Figure 7
Figure 8
Figure 9
Figure 10
Figure 11
Figure 12
Figure 13
Figure 14
Figure 15
About the Author
Dr. W.F. (Jack) Turbyfill is in private practice specializing in fixed and removable prosthodontics. He devotes much of his time to teaching the complete denture technique in participation and demonstration seminars with patients. He is a faculty member at the Center for Advanced Dental Study in St. Petersburg, Florida, as well as a member of the American Academy of Esthetic Dentistry and a fellow of the Academy of General Dentistry. Dr. Turbyfill can be reached at 115 Medical Circle, West Columbia, SC 29169, phone (803) 794-4472.
