CAD/CAM Technologies: Providing esthetic restorations with ease
By Jonathan L. Ferencz, DDS
Introduction
As CAD/CAM technology continues to be integrated into dental offices and laboratories, the benefits of its use cannot be overstated. Dental CAD/CAM systems and relevant materials allow clinicians to offer a variety of innovative dental services to many of their patients who otherwise may receive less than optimal care, or require multiple and time-consuming appointments. Digitally fabricated models and restorations have been shown to demonstrate greater accuracy when compared to those fabricated using conventional procedures. CAD/CAM technologies help to eliminate human errors that lead to inaccuracies and remakes, as well as alleviate concerns over material costs and manual handling.
RELATED | Implementing an in-office CAD/CAM restoration system
With patient acceptance of the treatment plan, CAD technology can be used to design and fabricate both provisional and definitive restorations with great ease. The indirect restorative process becomes even more predictable when advanced materials such as lithium disilicate (IPS e.max, Ivoclar Vivadent) are selected. Comprised of metal-free materials with 70% needlelike crystals by volume in a glassy matrix, lithium disilicate demonstrates exceptional durability and strength, especially when compared to other all-ceramic materials. In addition to these qualities, lithium disilicate also exhibits higher translucency, monolithic strength, and higher edge strength than other glass ceramic materials, other metal, or metal-free restorations.
Yet lithium disilicate is not the only advanced material being used to expand dental CAD/CAM capabilities. Acrylate polymer blocks (Telio CAD, Ivoclar Vivadent) combined with digital processes reduce several obstacles affiliated with traditional temporization, including impression and mixing errors, polymerization shrinkage, and difficulties with cleaning. This allows accurate provisional restorations to be fabricated, which in turn benefit the overall restorative process.
RELATED | Reducing remakes with CAD/CAM technology and new practitioners
Such provisional restorations serve as the basic template for the definitive restorations and work to ensure their predictability by aiding in the design of the occlusion, structure, and shape of the proposed restorations.
When CAD/CAM equipment is chairside, it improves both workflow and efficiency. The following case demonstrates the capabilities of CAD/CAM technologies for fabrication of provisional and definitive restorations.
Case Presentation
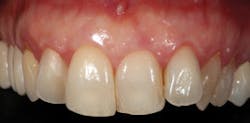
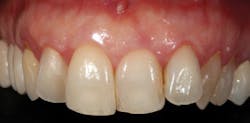
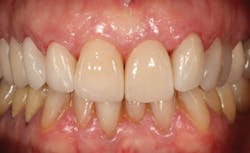
A 59-year-old female patient presented with crowded teeth and a desire to change the general appearance of her smile (Fig. 1). Her left lateral maxillary incisor was naturally positioned too far labially, casting a shadow on the left canine and creating a darkened appearance. Orthodontic treatment followed by an evaluation for veneers was proposed, but the patient declined orthodontic treatment at this point in her life.
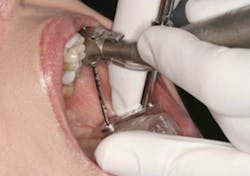
An intraoral digital scan (Fig. 2) (Trios Color, 3Shape) was employed to capture an accurate view of the patien's dentition to assess the feasibility of correcting both the positional irregularity of the lateral incisor and the general appearance of the teeth with full-coverage restorations on the six maxillary anteriors. To further develop this treatment plan, proposed margins were outlined in the digital software. The stone view of the scan allowed the clinician to see the original contour of the patient's teeth and propose alterations (Fig. 3).
Since the right central incisor required the fewest changes, it served as a guide for the remainder of the design (Fig. 4). Viewing the proposed design from the incisal illustrated how the right canine would be placed slightly more labially, and the right lateral would have contour added to the mesial of the labial surface to ensure overall harmony (Fig. 5). The left central would have contour added to the labial, and the incisal edge would also be positioned more labially. The left lateral incisor was recontoured to the lingual, while the left canine was contoured to the labial to adjust for the shadow of the protruding lateral incisor.
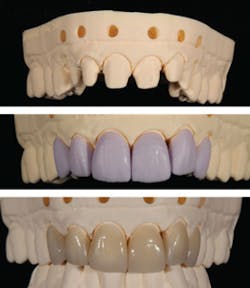
The laboratory technician completed the digital proposed treatment plan, which was reviewed and approved by clinician and patient (Fig. 6). The provisional restorations, calculated to be 0.8 mm thick and fabricated using Telio CAD, were then designed in the CAD software (Fig. 7). Once the completed provisional restorations were returned to the office for the first clinical visit, the six maxillary teeth were prepared and the Telio CAD temporaries were then tried in (Fig. 8). This actually served as a guide to ensure adequate reduction. The temporaries were then relined and temporarily cemented. The patient was allowed to function with the provisional for several weeks.
Once approved by the patient, the provisionals were scanned during the second clinical visit for use in designing the definitive restorations and removed. The gingiva was then retracted, and the preparations, adjacent teeth, and bite registration were all scanned (Fig. 9). These scans were merged with the scans of the provisional restorations to develop the definitive restorations (Figs. 10-11). The restorations were milled from IPS e.max CAD Block HT B1 using a Planmeca- E4D mill.
A die model was also fabricated at the milling center using 3-D printing based on the scans (Fig. 12). The model was used to fit the IPS e.max CAD crowns and verify contacts and occlusion. Surface texture was carved in by hand, after which the crowns were stained, glazed, and hand polished.
They were then tried in, compared to photographs of the patie'’s original dentition, and approved by the patient (Fig. 13). The restorations were cemented using resin-reinforced glass ionomer cement (Fuji Plus, GC America) after a final comparison.
Conclusion
CAD/CAM technologies, when used with advanced materials such as lithium disilicate, are eliminating previous difficulties with indirect restorative dentistry and simplifying the overall process. It behooves clinicians and laboratories to earnestly consider the possibility of adding such a system to their workflow, both for their own and their patien'’ benefit.
RELATED | Taking CAD/CAM same-day dentistry to a new level of ease and profitability
Acknowledgments
Marisa Notturno and Pasquale Fanetti, technicians at NYC Prosthodontics, completed the laboratory procedures, including digital design.
Jonathan L. Ferencz, DDS, is a graduate of the New York University College of Dentistry with a specialty certification in prosthodontics. A clinical professor of prosthodontics, Dr. Ferencz also practices privately at NYC Prosthodontics in Manhattan. He is a diplomate of the American Board of Prosthodontics. Reach him at [email protected].
Past DE Articles
