Better orthodontic impressions with the putty + wash method
I have found myself needing to consistently capture an accurate full-arch impression without voids. The easy answer, nowadays, is to use a digital scanner and capture the impression digitally. But many of our colleagues do not have the time and/or the money to invest in such equipment.
Additionally, certain orthodontic products offered on the market require digital impressions from a specific brand of digital scanner. That scanner, and many other scanners, typically would not yield an ROI signficant enough to warrant the initial, and ongoing, investment for many practitioners.
Instead, most of us use some sort of combination of heavy- and light-body vinyl polysiloxane (VPS) to capture impressions. The heavy and light bodies are dispensed out of a cartridge and then placed in one step into the patient’s mouth. Most of the time this works out well for capturing one, two, or three-plus indirect restorations.
Transforming patients and practices through a seamless digital workflow
Implant impressions: Tips and tricks for better results
But what about when an accurate full-arch model is taken? It is incredibly difficult to capture every detail of an arch in one shot using a one-step VPS impression. There’s a high chance that some portion of a tooth or vestibule will be missed. Certainly, custom trays can help, but those require an extra impression, an extra expense for the practice, and extra time for practitioner and patient. This is hardly ideal in today’s private practice climate and expectations of our patients.
My everyday clinical technique to address this is the putty + wash method. I had heard about this method many times previously, but over time I have been able to perfect and utilize it in private practice with repeatable and precise results.
I mostly use the putty + wash method for full-arch impressions required for clear aligner orthodontia. However, it’s also useful for fabricating “flippers,” pre-wax-up models, and stents for indirect temporization once a wax-up is back from the lab. Some practitioners have used this as the final impression method for indirect restorations, but I personally have not attempted that technique.
I have been lucky enough to try various companies’ VPS materials and compared them using the putty + wash method. Along the way, one of my favorites has become Voco’s V-Posil line of materials. Not only is this material top-of-the-line, but it has also been one of the most consistent products I have used.
V-Posil does all that it is advertised to do and more: Excellent tear strength and elasticity—check. Exceptional dimensional stability post-set—check. Contact angle similar to that of polyether for better hydrophilicity and displacement of fluids—check. Fast-set time frame for patient comfort and clinical efficiency—check.
It even has a secondary setting reaction using the oral cavity’s and body’s heat to snap-set instead of having to wait for the catalyst-base reaction to finish. What does that mean clinically? A long pre-insertion working time and a faster post-insertion set time.
I encourage everyone to try Voco’s V-Posil VPS material. I have found it to be one of the best VPS materials on the market. And for those of you who might not have heard of or don’t know how the putty + wash method works, look below for a quick guide.
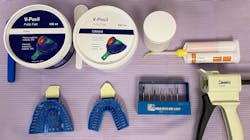
Setup: The initial setup includes: (1)V-Posil Putty Base & Catalyst, (2) V-Posil X-Light/Light VPS 50 mL cartridge and dispensing gun, (3) appropriate impression trays, (4) alcohol wipes, and (5) straight handpiece carbide burs (figure 1).
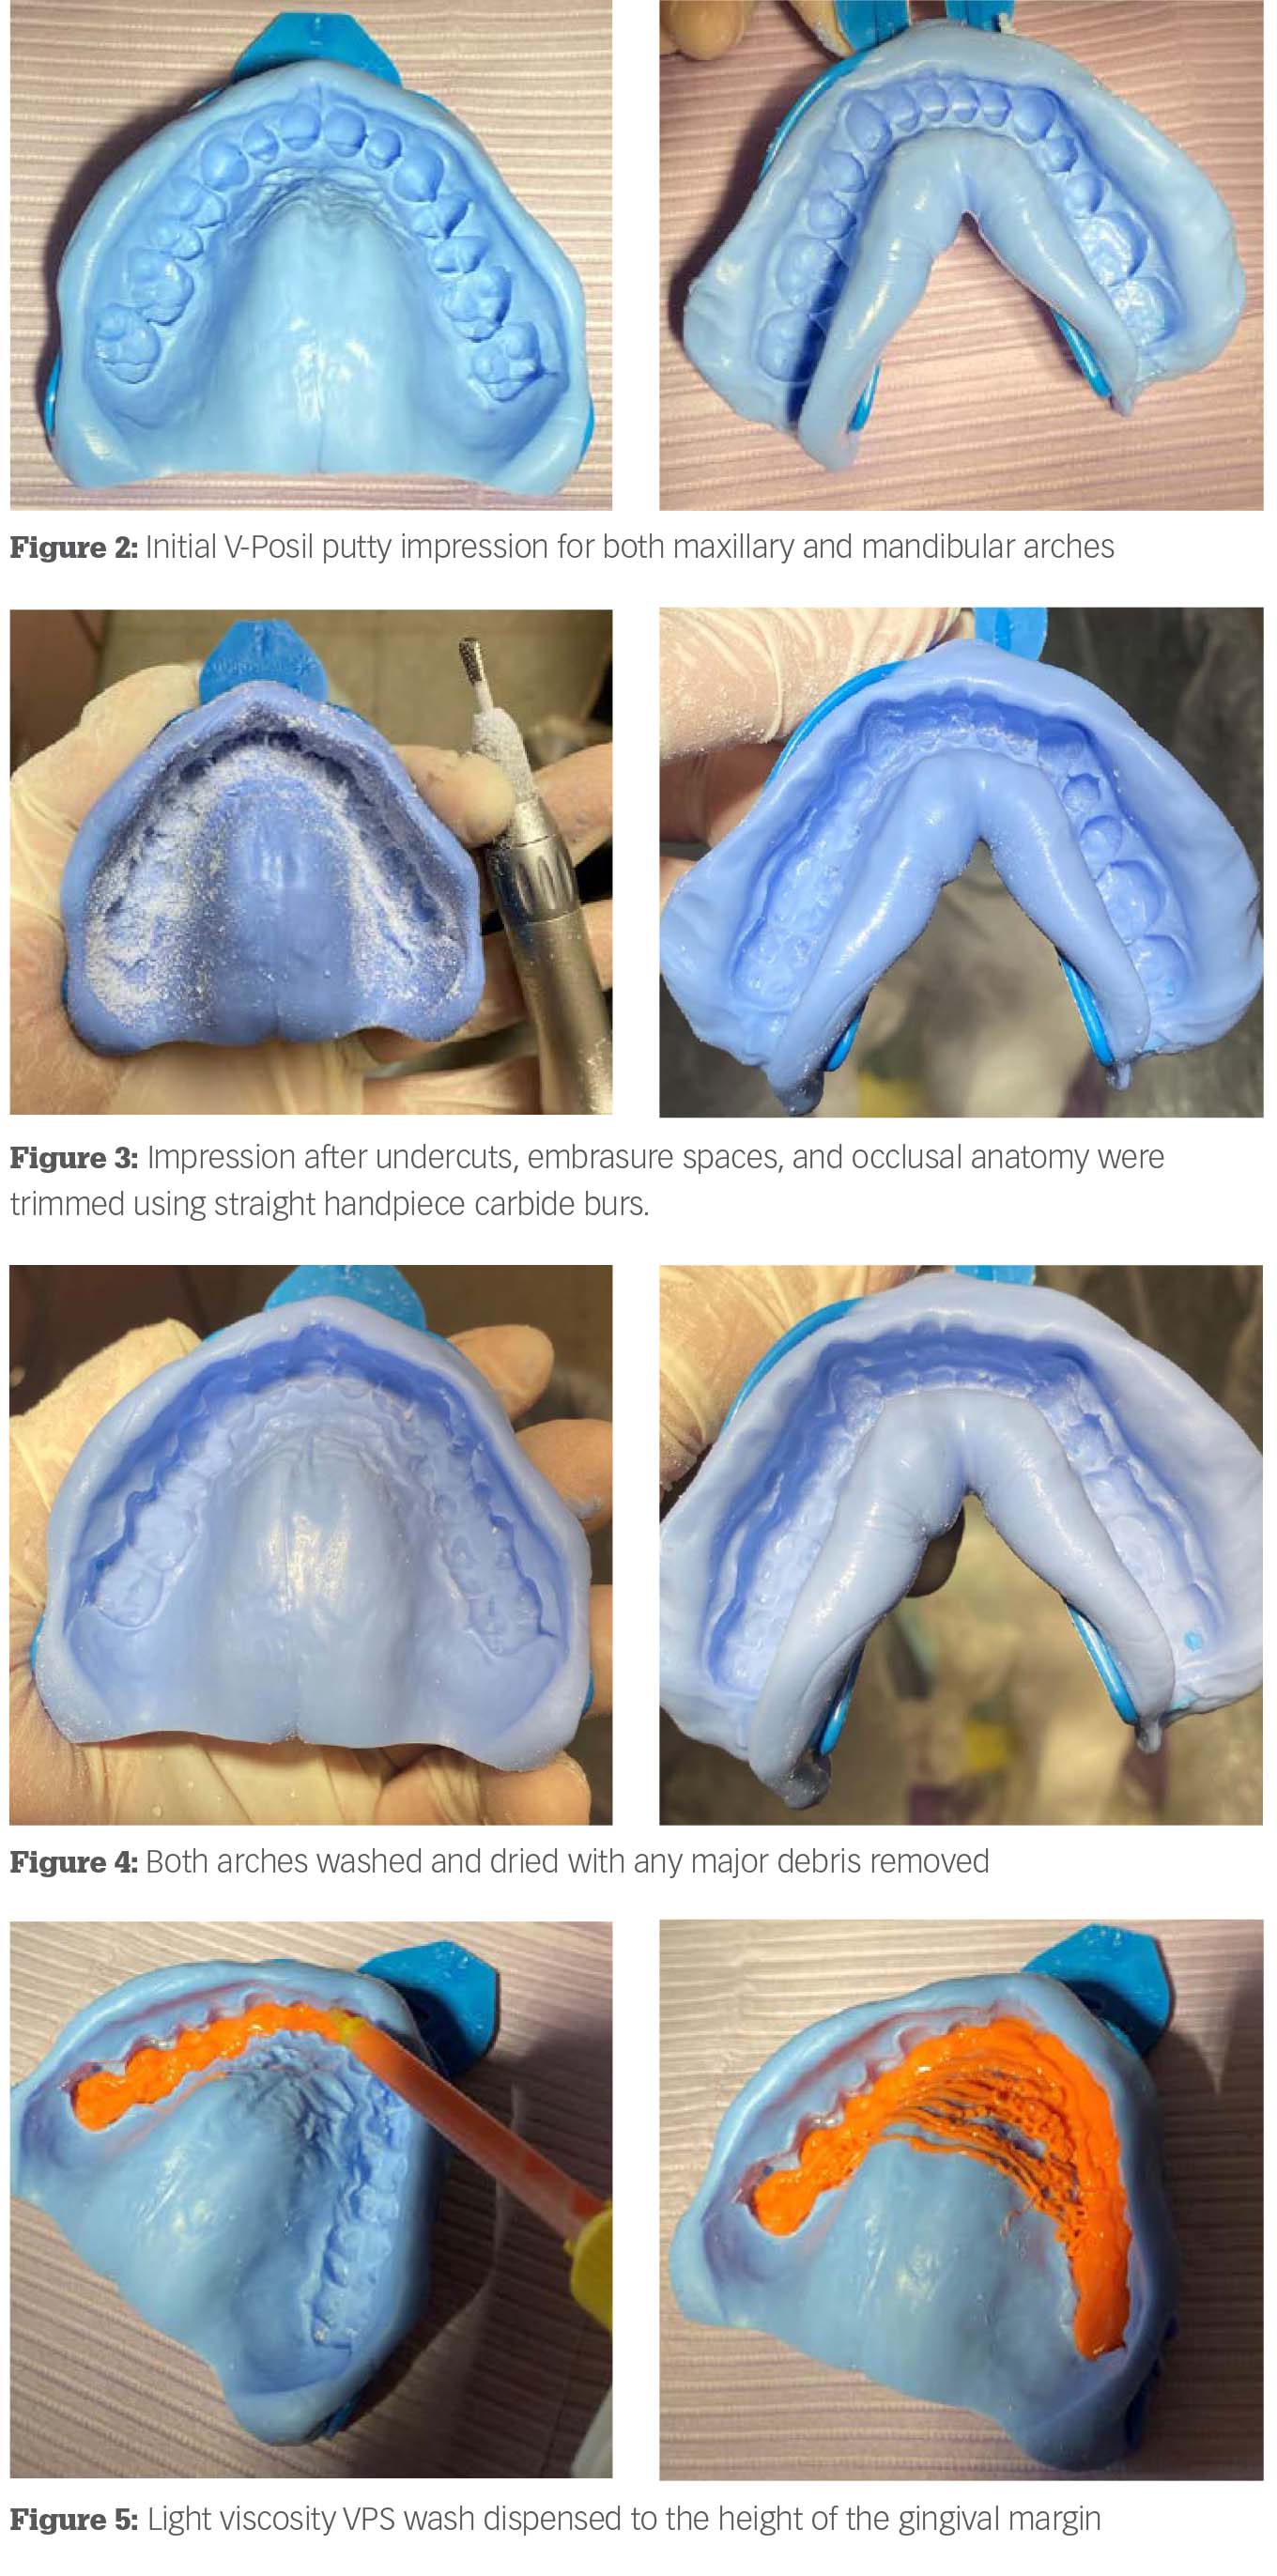
Initial putty impressions: In figure 2, you can see the initial V-Posil putty impression for both maxillary and mandibular arches. Note that the V-Posil putty has acted as a pseudo-custom tray due to the viscosity of the material. It also allows you to border-mold for further adaptation.
Anatomy removal: I have found that the most predictable way to achieve a rock-solid result is to trim away any undercuts, embrasure spaces, and occlusal anatomy using straight handpiece carbide burs (figure 3). The idea is to leave just enough occlusal stops to have a dimensionally stable seating during the second step of the putty + wash method. This is especially important in the mandible, where there isn’t a palate. Note that one side is trimmed of embrasures, undercuts, and pertinent occlusal anatomy (figure 3).
Alcohol clean: In Figure 4, you can see both arches washed and dried with any major debris removed. The most critical step prior to the wash will be using an alcohol wipe inside the entirety of the impression. Any leftover blood or saliva can affect the adherences of the VPS wash to the putty and cause the practitioner to have to retake the wash impression.
The wash: I have found that dispensing the light-viscosity VPS wash to the height of the gingival margin will yield the best final result without the excess causing distress to the patient. In Figure 5, the V-Posil putty did its job beautifully, and you will notice I did not have to overadd the light-viscosity wash to make up for voids in the vestibule.
The final result: The putty + wash method gives the results we as practitioners need for consistent results. Using a material like Voco’s V-Posil makes it even easier. Remember to use steady and heavy force when placing the wash into the patient’s mouth.
Note: Voco is a financial supporter of DE. All products mentioned in this article are used in the author’s normal course of practice.
Editor's note: This article appeared in the July 2022 print edition of Dental Economics magazine. Dentists in North America are eligible for a complimentary print subscription. Sign up here.About the Author

Neville T. Hatfield, DMD
Neville T. Hatfield, DMD, graduated magna cum laude from the Boston University School of Dentistry. He completed a general practice residency at the Manhattan Veteran Affairs Hospital, where he provided interspecialty comprehensive prosthetic and surgical treatment to medically complex patients. When he is not treating patients in northern New Jersey, he enjoys lecturing about dental materials and products.
Updated April 7, 2023