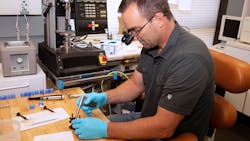
In many ways, I’m a typical dentist. I practice four days a week. I see patients full-time. I manage staff and insurance issues. I strive for perfect dentistry. I enjoy my work, and I love my profession. However, I’m unusual in that I have had the opportunity to test more than 20 adhesives on the dental market today.
Evaluating bonding agents
To be able to put an actual number to the strength of various adhesives is eye-opening.
I get to teach dentists all over the country about what I’ve found. During these sessions, participants complete a hands-on exercise, and I see the results that these dentists get with various bonding agents. When it comes to technique, there are as many different variations as there are outcomes (and some are certainly more desirable than others).
It is impossible to have the technique discussion without understanding that not all adhesives perform the same. The strength of the various adhesives on the market are wildly different. Peak Universal Bond (Ultradent) has the highest bond strength of any adhesive I have tested. This is true for both dentin and enamel. There are a few other adhesives on the market that are close in strength, but there are many that fall short.
Additional reading: Combining glass ionomer, IDS, and CEREC for intelligent hybrid restorations
I always encourage dentists to get online and find, in megapascals (MPa), the expected bond strength to both dentin and enamel. Then, compare those numbers to Peak Universal Bond, which averages 67 MPa to dentin and 52 MPa to enamel.
Currently, there is a pervasive attitude in the profession of “good enough” when it comes to bond strength. The marketing for many adhesives claim “high bond strength,” but I assure you they are not all “high” and many are downright low. If your dentin bond strengths are not above 50 MPa, a change may suit you well.
My explanation of technique will be specific for Peak Universal Bond. Each adhesive on the market will have slightly different instructions, and yet the similarities can be impressive because nearly all are ethanol-based.
Wet bonding
To begin, we must understand “wet bonding.” We need tooth structure that is completely saturated with water but that has zero standing water on the surface.Dental etching techniques
Total-etch, self-etch, or selective-etch and the when/why of each are worthy of an article on their own. Total-etch for Peak Universal Bond is 35% phosphoric acid on dentin and cut enamel for 15 seconds. Full air/water rinse and then back to completely saturated with no standing water is ideal.
For self-etch, application of Peak SE for 20 seconds is required. While the self-etch is on the preparation, it is necessary to agitate the SE. This allows the chemistry to be moving and constantly getting fresh chemicals to the surface being treated. There’s no need to rinse with water after this treatment, but you must completely remove standing SE from the preparation while maintaining complete saturation.Selective-etch would be the total-etch technique performed on enamel with a full rinse, followed by the aforementioned SE treatment.
Bonding application technique
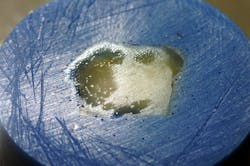
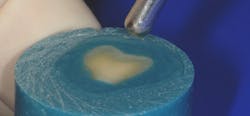
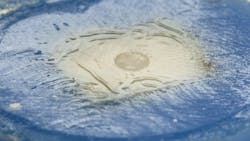
Once etching has been completed, application of the adhesive begins (figures 1–6). It is critical that the entire preparation be covered with adhesive for the fullBe exact with etching time and adhesive placement. If you shorten the time, you lower the bond strength!
The adhesive must be thinned with air free of contaminants. A dedicated airline would be advantageous; however, simply running air through the air/water syringe while bouncing the air/water tip on the patient bib will make a significant impact on removing water from the syringe tip. This step is easy, but one that most practitioners fail to consider.
Now we need time for the ethanol to evaporate. If we thin but don’t allow for evaporation, our bond strengths will decrease. To accomplish the critical drying step, simply keep the air blowing. Then move your syringe tip back about four inches from the prep and continue blowing air across the prep.
The entire thinning and drying procedure should take 10 seconds. Too many of us thin but do not dry. Far too many of us wave the syringe tip back and forth like a hair dryer. This poor technique results in waves in the adhesive, and these waves result in lower bond strengths.
Once the thinning and drying steps have been accomplished, light-curing can be completed. Use a 10-second cure time directly over the prep.
It’s critical that a full cure of the flowable composite be done after this thin layer is placed. At this point, the clinician can place composite material and be assured that the highest bond strengths available have been achieved.
“Good enough” isn’t good enough
Achieving high bond strengths is extremely technique sensitive. Sloppy application will produce very poor bond strengths.
When it comes to bond strength, the “good enough” attitude is alarming. We see composites fail and rarely attribute that failure to the adhesive we are using or the technique we employ. This is a gigantic mistake. It doesn’t matter how beautiful your restorative work is if it is resting on a foundation of poorly performing product and/or poor adhesive placement.
The opportunity I’ve had to watch literally hundreds of dentists place adhesive has taught me much. We all think we have this technique under control, but we do not. I would encourage you to look very closely at the adhesive you use and be mindful of your technique.
If you want the very best for your patients, mastering this bonding technique and using the highest performing adhesives on the market will be well worth the effort.
Editor's note: This article originally appeared in the February 2022 print edition of Dental Economics.
About the Author
Shea Bess, DDS
Shea Bess, DDS, graduated from the University of Utah in 1998 with a BS in medical biology, and he received his DDS from Loma Linda University in 2002. He owns a dental practice in South Jordan, Utah, and has served those with limited access to dental care by providing dentistry in Fiji, Guatemala, Utah, and working with the Navajo Nation. Dr. Bess has been involved with Ultradent’s R&D department since 2003.
