Custom healing abutments as a specialty practice differentiator
Most specialists know that well-executed custom healing abutments create better tissue contours and prosthetic outcomes. The traditional process used to achieve these outcomes tends to be time-consuming, cumbersome, and unpredictable, so they generally resort to stock healing abutments. Today, the true differentiator for surgical practices is modern digital workflows that allow the simple, predictable creation of high-quality solid titanium custom healing abutments. Here, I will explain how to leverage technology in your specialty practice to differentiate yourself while giving your patients the best possible tissue contours for their implant-supported restorations.
In the conventional specialty practice, implant patients are referred by a general dentist. Implants are placed freehand, the patient is monitored through healing, and the case is referred back for restoration, which generally involves two appointments for impressions and subsequent delivery. This treatment model—while proven effective—does nothing to differentiate a surgical specialty practice. However, implementation of lab-fabricated custom healing abutments via intraoral scanning allows specialists to give their referrals a superior experience and their patients better restorative results.
Laborious vs. streamlined
Traditionally, custom healing abutments involved manual addition of an idealized gingival contour to a temporary abutment either before or after surgery, thenThis process is both laborious and unpredictable. At each step, there is the possibility that the carefully created tissue shape will be lost due to the unpredictability of the process. The patient experience is also often compromised because these lengthy procedures are usually done while the patient waits.
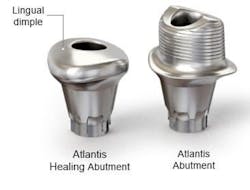
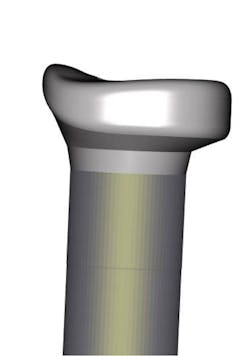
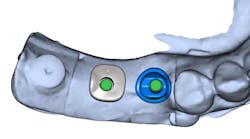
Modern digital workflows have streamlined this process and created more predictable outcomes. After the day of surgery, no fixture level scans are required. When using a system such as the Atlantis Custom Healing Abutment (AHA), the implant position is scanned at the time of implant placement. A custom-machined healing abutment from solid titanium is fabricated for optimal tissue health and support (figure 1). The original file is preserved at the laboratory and the final abutment is ordered after integration with an exact copy of the custom healing abutment’s gingival emergence. This final abutment can be fabricated for either a screw-retained or cement-retained restoration. This eliminates all the cumbersome steps historically needed to replicate the handmade custom healing abutment. This workflow is not only more expedient and predictable, but it also provides increased patient convenience by eliminating one restorative appointment. Using this workflow, many patients will only need a delivery appointment with their restorative dentist. This reduction in restorative appointments is the true practice differentiator for the surgical specialty practice.
Related content:
Building a "futureproof" digital workflow
When are implants the best choice?
Two methods: Freehand and guided workflow
There are two methods to create custom healing abutments using this method: first is via a freehand surgery, and the second is using a fully guided protocol.In either case, the patient must be evaluated before referral to the restoring dentist. If the patient’s tissue is essentially in the same vertical position that it was at the time of placement, no additional scans are needed. If the tissue has substantively remodeled, if using the Atlantis system, a digital impression of the AHA in place is taken and returned to the lab. You do not need to remove the healing abutment for this scan. The information from your first scan, along with this new tissue scan, will give the laboratory the data necessary to fabricate the abutment and restoration.
Some surgeons would like to avoid a second-stage surgery. In that case, aIn either the freehand or guided workflow, you are providing optimal tissue contour from a well-made custom healing abutment. You can also make the master impression for your restoring dentists, thus saving them and their patients an appointment. As an additional differentiating service, the scan that you take for the custom healing abutment can be used to make an immediate provisional restoration instead, giving your patients teeth instead of removable prosthetics on the day of surgery.
When you begin to follow this workflow, there are a few considerations. Since you are making the master impression, you will need to know which laboratory your restoring dentist prefers. It is also helpful to note on your prescription that the restoring dentist will send final specifications for the restoration’s materials, shade, and style of retention separately. This may seem cumbersome at first, but once a defined protocol is developed, this workflow can go quite smoothly. The patient will appreciate the reduction in total appointments, and your referrals will appreciate the optimal tissue contours that you develop.
For surgical specialists who want to grow their practices through differentiation with proven, predictable technologies, custom healing abutments provide an exciting new opportunity!
Editor's note: This article appeared in the November 2021 print edition of Dental Economics.
About the Author
Tramain Watkins
Tramain Watkins, the clinical director for guided surgery at National Dentex, is a certified dental technician with over 30 years of dental laboratory experience. He has extensive experience in all the technical aspects of dental laboratories, including both fixed and removable prosthetics with an emphasis on implant-supported and retained restorations. Mr. Watkins also specializes in technician training and clinical education, dental technology, guided surgery, case planning, materials selection, and clinical troubleshooting.
Updated October 8, 2021


