Pearls for Your Practice: Provisional material, suction mirror, syringe, whitening kits
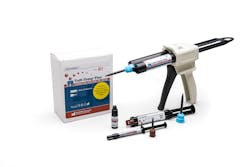
Tuff-Temp Plus provisional material by Pulpdent
For the most part, I really enjoy fixed prosthodontic procedures. We all enjoy the feeling when we have an easy delivery of a well-made indirect restoration. Unfortunately, the number-one barrier to that smooth delivery appointment is the provisional. A well-made provisional holds the prepared teeth in place so the final restorations fit. Even taking a provisional out of occlusion just slightly can lead to increased seat times after two weeks.
The provisional is also the primary barrier during comprehensive cases. I don’t find anything as challenging or technique sensitive as creating a six-plus-unit provisional. The time and attention required is extreme. Having a provisional material that is strong and trims well can be the difference between a nightmare delivery appointment and a smooth one. Tuff-Temp Plus gives me the strength and accuracy I need to make my life easier when it comes to seat day.
Tuff-Temp Plus is a resin composite provisional material for crown and bridge procedures. What sets Tuff-Temp Plus apart is its rubberized resin chemistry, which yields a material that is tough and resilient. In fact, Tuff-Temp Plus is up to 50% tougher than most bis-GMA (bisphenol A-glycidyl methacrylate) products, according to the manufacturer. This toughness produces provisionals that won’t break on us, which eats up more chair time and inconveniences our patients.
The rubberized resin chemistry also reduces polymerization shrinkage, yielding temps that fit better and are more retentive. When trimming Tuff-Temp Plus, you will find that it does not gum up your bur and that it grinds to a clean powder. That clean trimming will allow you to trim very precise, accurate margins.
The working time is approximately 45 seconds. It should be fully set two minutes after mixing. It is a dual-cure material, so you can speed things up by light curing. Of course, this only works if you are using a clear matrix of some sort. Even if you don’t use a clear matrix and rely on the material’s self-curing ability, you should be trimming the temp in two minutes. Sometimes I accidentally overtrim my provisionals or get voids. Pulpdent offers a shade-matching add-on material for such occasions. This is a flowable resin that bonds to the rubberized urethane chemistry of Tuff-Temp Plus. It can be a lifesaver.
Esthetics are high on the list of Tuff-Temp’s features. With built-in fluorescence and six shades (A1, A2, A3, A3.5, B1, and Bleach), you can meet most esthetic challenges. Also, a light-cure glaze material is available for use with Tuff-Temp Plus. This shine can turn your provisionals up to 11.
When factoring in toughness, durability, lack of shrinkage, ease of trimming, and esthetics, I find Tuff-Temp Plus tough to beat. Triple to the right center-field power alley for Pulpdent!
Nu-Bird HVE Mirror System
If I could have any superpower that would affect my dentistry, I think x-ray vision would be the best, for obvious reasons. After that, laser vision, hypnosis, time control, and superspeed would be on the list. Right in there with those would be a third hand. How great would that be? Having an extra hand for suction or to keep a mirror clean would be a game changer for dentists and dental hygienists. The Nu-Bird HVE Mirror System can give you that third hand superpower very economically.
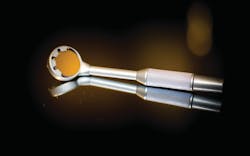
The Nu-Bird HVE Mirror System marries the mouth mirror and high-volume evacuator (HVE) for several great benefits. First, Nu-Bird provides a clear, fog-free view. Nothing is as annoying as a mouth-breathing patient who constantly fogs up the mouth mirror. Nu-Bird’s air pathway ports on the front and back of the mirror will prevent the dreaded fog. Even when the mirror is placed against the mucosa, air flow is constant, and the mirror remains fog-free.
Aside from keeping your mirror fog-free, the Nu-Bird operates as a high-volume evacuator. The design of the Nu-Bird allows the air ports around the mirror to efficiently and effectively suction fluids without impeding the clinician’s vision. This makes the Nu-Bird great for the hygiene department. Having a mirror and HVE in one makes scaling and root planing procedures faster and easier.
Installation of the Nu-Bird HVE Mirror System is easy. Simply plug the metal Nu-Bird adapter into the HVE port. Loop the hose around toward the patient and insert the Nu-Bird mirror into the other end of the hose. Turn on the HVE, and you’re ready to roll. The Nu Bird suction mirror handpiece can be autoclaved after each use, so having a few of the suction mirrors will help keep the Nu-Bird sucking all day. ne of my hygienists used the Nu-Bird in her operatory for a few days. She thought the Nu-Bird was easy to set up and maintain, and she liked that it gave her an extra hand, making procedures such as scaling and sealant application much easier. She also thought the Nu-Bird suction mirror was great for retraction on patients with strong cheeks and tongues. She did say that the extra bulk of the suction mirror takes a little getting used to, as does the extra sound. Her exact words were “ . . . but that’s a small price to pay!”
Nu-Bird can give you or your hygienist an extra hand when it’s needed most. Whether it be keeping your mirror fog-free or suctioning without requiring you to hold a standalone high-volume evacuation tip, Nu-Bird can make procedures easier on both clinicians and patients. Line-drive double into the right field corner for Nu-Bird!
AutoSyringe by Vista Dental
There are few things we do in dentistry that pose a risk of injury to our patients. Sure, there are some minor things, such as breaking a buccal plate or pushing a root into a sinus during an extraction, but those generally don’t lead to horrific post-op photos. I will never forget sitting in a sophomore endodontics lecture and seeing photos of a sodium hypochlorite injury for the first time. I was appalled. I have always had those images in the back of my mind when I do endodontic procedures in my practice. Fortunately, I have never had a significant hypochlorite injury. I would like to keep it that way. AutoSyringe by Vista Dental Products can help minimize that risk, and it provides a few other advantages as well.
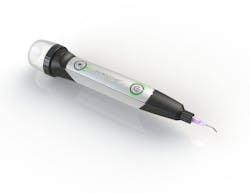
The AutoSyringe is a cordless, compact rechargeable device used for endodontic irrigation. It has three adjustable flow-rate settings that help prevent sodium hypochlorite injuries. We no longer need to rely on subjective ideas of an appropriate amount of digital pressure when irrigating. Using the AutoSyringe, we can get safe apical pressure.
Any irrigant can be used in the AutoSyringe, which obviously includes sodium hypochlorite. The irrigant is added to quick-connect 20 mL canisters. Having a 20 mL reservoir of irrigant will cut down on the number of refills you need during an endodontic procedure. Want to use EDTA along with your sodium hypochlorite? Switching from canister to canister takes only a few seconds, and the AutoSyringe kit comes with three 20 mL canisters.
The AutoSyringe is compatible with all standard irrigating tips, so you aren’t locked into specialized disposables. In addition, the tip rotates, giving you easy access to any canal. As far as infection control goes, the nose cone is autoclavable and plastic sleeves cover the rest. The AutoSyringe comes with three autoclavable nose cones.
Another massive benefit of the AutoSyringe is reducing fatigue. This may not be a huge benefit for someone like me, who does one root canal each week or even each month—but for an endodontist who does endo all day every day, the AutoSyringe can eliminate a lot of hand and finger fatigue and pain.
When you consider the safety that the AutoSyringe provides, along with the ergonomics, it’s a very handy tool to have in your armamentarium if you do endodontics in your practice. Just pulp a tooth every few months? You probably won’t see the same kinds of benefits. But if you are doing endo daily, it will definitely help you out. Base hit to right field for Vista Dental Products and the AutoSyringe!
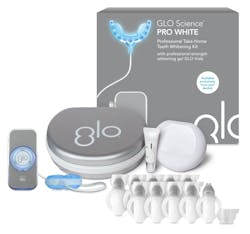
GLO Science Professional Whitening Kits
A couple of months ago, I was scrolling through my Instagram feed and stumbled upon a post that used the hashtag #getgloing. A patient had posted it from a dental office on the other side of the city. The patient was doing an in-office whitening procedure with a cool blue light-up mouthpiece. Since I had recently remarked to my assistant that we had been having a frustrating lack of results with our in-office whitening product, I decided to do some research. What I found was a product, designed by a dentist, that offers great whitening results, both in the office and at home, with little to no sensitivity.
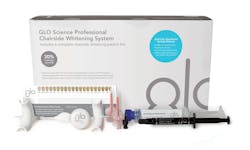
GLO Science Professional relies on a battery-powered mouthpiece to hold the hydrogen peroxide gel closely against the teeth while heating it up. When the hydrogen peroxide gel is warmed, it whitens teeth faster, which leads to a decrease in sensitivity. Using some sort of external light or heat source for in-office whitening is nothing new. However, adding this technology to a take-home bleaching kit is a novel concept.
GLO Science Professional in-office whitening is available in both 30% and 24% strengths of hydrogen peroxide gel. The in-office kit also includes a gingival barrier, a lip and cheek retractor, vitamin E oil, and a patient shade guide. The in-office procedure works similarly to most other systems, although it’s faster. Insert the retractor and apply the gingival barrier to get started. Then apply the GLO Science hydrogen peroxide gel to the teeth, and insert the mouthpiece for eight minutes. A full in-office treatment will be four rounds of eight minutes. After a few procedures, your assistants will be able to do a GLO Science Professional in-office treatment in less than an hour.
Take-home whitening is a great product to offer your patients; however, it can be labor intensive. Making impressions, pouring models, and fabricating trays take time. With a GLO Science Professional take-home kit, your team won’t have to do any of that. The take-home kit includes a mouthpiece and battery and 40-plus applications of 10% hydrogen peroxide gel. The patient simply paints the gel on the buccal surfaces of their teeth, inserts the mouthpiece, and turns it on. Four cycles of eight minutes per day for five to seven days should do it for most patients. Again, sensitivity is minimized because of the reduced time of application.
I have found that my staff has embraced GLO Science Professional, spearheading its use in my practice. They enjoy doing the in-office treatments, and they talk to patients about it often. The staff’s enthusiasm coupled with social media make this a product that patients want and are willing to pay for. GLO Science Professional is easier on my team than previous systems we’ve tried, and it works better, making it a win all the way around. Line-drive base hit up the middle for GLO Science Professional!
Joshua Austin, DDS, MAGD, attended University of Texas Health Science Center Dental School. After graduating, he associated for several years. During October 2009, he opened a solo general practice in a suburban area of San Antonio, Texas. Dr. Austin is involved in all levels of organized dentistry and can be reached at [email protected].
About the Author
Joshua Austin, DDS, MAGD
Joshua Austin, DDS, MAGD, is a graduate and former faculty member of the University of Texas Health Science Center at San Antonio School of Dentistry. Author of Dental Economics’ Pearls for Your Practice column, Dr. Austin lectures nationally on products, dental technology, online reputation management, and social media. He maintains a full-time restorative dentistry private practice in San Antonio, Texas. You may contact Dr. Austin at [email protected].
Updated June 21, 2023
