Pearls for your practice
By Joe Blaes, DDS
3M ESPE
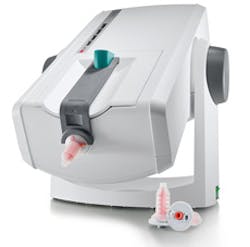
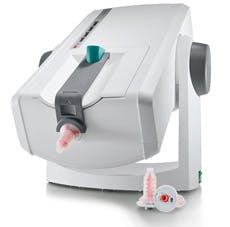
Pentamix™ Lite Automatic Mixing Unit3M ESPE has developed a new model in the world of automatic impression material mixing with a convenient speed that is suited for beginners or dental practices that make numerous impressions every day. The Pentamix Lite mixing unit is designed to work with all 3M ESPE Penta™ Impression Materials (from high-viscosity putty to medium-bodied materials) and will consistently deliver a homogeneous, reproducible mixing quality for void-free impressions. Like its predecessors, the Pentamix Lite mixing unit helps you save valuable time compared to hand-mixing. The device's mixing speed lets you fill even very large trays with heavy-body, medium-body, and high-consistency putty materials in only 30 seconds. Smaller trays can be filled even faster. The mixing unit setup is fast and intuitive: just plug in, push the start button, and start mixing. With its unique swivel design, this mixing unit can change from the upright standby mode to the working position in just one easy movement. In the upright standby mode, it requires less than half the space of other automatic mixing devices (and only two-thirds of the space compared to the Pentamix 3 unit). Thanks to its light weight and an ergonomic handgrip, it can easily be carried from one operatory to another. There is a new Penta™ Mixing Tip that will be used for all Pentamix devices. It is red in color and has a gray cover plate to increase visibility when attaching a new tip. It also has an enhanced geometry that facilitates the correct insertion in all Pentamix devices. Dental professionals prefer using an automix device, such as the Pentamix™ System, as compared to hand or even gun-mixing. My assistants love it! When it comes to accuracy of impressions and final restorations, simplified work procedures, and higher productivity, using an automatic mixing unit offers significant clinical and practice-management advantages.
Visit www.3mespe.com/pentamixlite for more information.
from DENTSPLY Caulk
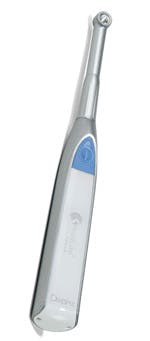
The key to this new LED curing light is "focus" because that is what makes this light different. It is designed to maximize the success of your composite restorations since it helps reduce the variables that are inherent with light curing. This light has a collimated light beam to minimize light divergence and ensure a reliable cure at distances that matter. A collimated light beam provides greater energy and a better conversion of resin at the gingival margin. This means a more solid restorative interface at the proximal box. This is where secondary caries usually begin. Since receiving this light for evaluation, we have placed a number of composite restorations and done some bench testing as well. We set up a jig with an 8-mm deep composite, and cured it with the SmartLite Focus. When we examined the composite, it was cured all the way through. This is due to the deep-penetrating collimated beam of energy. When curing restorations in the mouth, you will find that it is easy to keep the light flat on the tooth. This is due to the lightweight pen style design and a 330-degree head rotation. My chairside assistant found that this allowed her to easily maintain a steady hand at the proper angle. Keeping the light tip stable and flat to the restorative surface is critical. The angle at which the probe tip is directed affects the amount of energy that is delivered to the restoration. The light guide tip should be as close as possible and flat against the restorative surface to have the best chance at directing light to all corners of the proximal box. Angled light guides inherently produce light that strikes the restoration at an angle, causing light energy to scatter off the surface and to not be absorbed by the restoration. This is particularly true in the corners of the proximal box. Pen- or wand-style curing light designs can make it easier to keep the light tip flat to the surface of the restoration in areas where space is an issue, such as the back of the mouth with older (geriatric) and younger (pediatric) patients. The SmartLite® Focus produces a homogeneous beam profile that makes the light less sensitive to movement during the curing cycle and provides consistent curing performance across the restorative surface. The result is uniform curing performance within the curing area. You will always be ready to cure with a light that knows when and how much charging is needed. This light has a nickel metal hydride battery with Smart Recharge Technology that automatically adjusts charging modes depending on battery conditions. The charging unit maintains the battery charge and prevents overcharging. Best of all, this light does not require a learning curve. It is simple and easy to use with one button and one mode, a 20-second cure.
Visit www.smartlitefocus.com for more information.
from Golden Dental Solutions
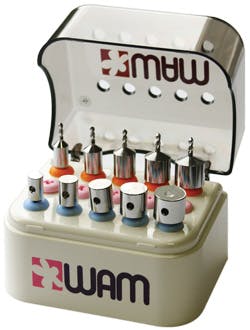
This is an alternative to fabricating conventional surgical guides that I came across at the Chicago Midwinter Meeting. The MD Guide provides an alternative method to fabricating a conventional surgical guide. As we know, using some sort of a surgical guide when placing implants to ensure they are properly positioned can be helpful as a millimeter can make a real difference in the final implant crown fabrication. What is clinically useful about the MD Guide is that you are not changing your current surgical protocol or dental implant system. The MD Guide just allows you to drill a pilot hole more accurately in terms of mesiodistal spacing and parallelism. Instead of using the pilot drill with your implant system, the MD Guide can be used. It is a pilot drill and an alternative surgical guide combined. You are still drilling "freehand" but with more accuracy. The MD Guide Intro Kit contains five drilling guides and five nondrilling guides (or virtual teeth) that are specifically sized to match the mesiodistal dimension of the future restoration. The drilling guides and nondrilling guides are sized at diameters of 6.0 mm, 7.5 mm, 9.0 mm, 10.5 mm, and 12.0 mm. The drill length is 7.5 mm, and has a diameter of 2.0 mm for all the drilling guides. Once the correct drilling guide size is selected, the cylinder is placed against the adjacent tooth to create a pilot hole. Once the first pilot hole is made, the drilling guide is replaced with the same-sized virtual tooth. For example, if you used a 7.5-mm drill, then place the 7.5-mm virtual tooth in its place upon completion of drilling a pilot hole. If an additional implant is being placed, you would continue the steps. But instead of estimating a second pilot hole, you will now align the drilling guide cylinder against the virtual tooth that was placed previously as opposed to against the actual tooth as was the case with the first pilot hole. The MD Guide system provides a simple solution to more accurate mesiodistal spacing and parallelism, no matter what implant system or brand you may be using. It is not changing current surgical protocol, but just helping make it more accurate. The MD Guide minimizes the stress of misaligned or malpositioned implants, and can save time and money as compared to conventional surgical guides. Finally, it will allow you to work efficiently and accurately in dental implant positioning mesially and distally. The system is simple to understand, and can be beneficial no matter your experience level or in-office technology used.
To watch clinical videos and for more information, visit www.goldendentalsolutions.com or call (877) 987-2284.
To have Dr. Joe Blaes present his lecture, "Pearls For Your Practice®," for your study group or dental society, please call
(866) 274-4500.
Past DE Articles


