Ask Dr. Christensen
Gordon J. Christensen, DDS, MSD, PhD
For more on this topic, go to www.dentaleconomics.com and search using the following key words: overdenture, edentulous patients, implants, arch, Dr. Gordon Christensen.
Q: I recognize that implants can significantly improve the retention and support of dentures for edentulous patients. However, I am hearing contradictory opinions on whether to use small-diameter implants or conventional-diameter implants to support and help retain overdentures. I want to use more implants in my practice, but I don’t know which type of implant is best for this purpose. Would you please give me some direction on this?
A: I am pleased to see that you are interested in treating this neglected portion of our professional responsibility. Numerous surveys have estimated that there are about 35 to 40 million adults in the U.S. who are edentulous. That number is about 20% of the adult population. It is my opinion that we American dentists can and should treat these unfortunate people better.
However, many of these patients have some or all of the following limiting characteristics — many are elderly, have limited income, have serious debilitating physical conditions, feel as though nothing can be done for their oral problem, or are discouraged and depressed because of their nearly intolerable oral conditions.
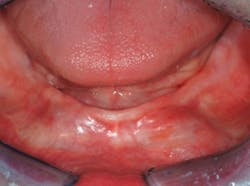
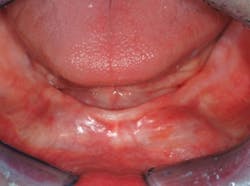
I feel that the majority of edentulous patients do not have the adequate financial resources to afford the widely advertised and successful “all-on-four” edentulous implant concept (Fig. 1). Therefore, I will answer your question assuming that the edentulous patients have meager to moderate financial ability. As you know, there are many other methods to treat edentulous patients than the ones described here, but most of them are expensive and some require significant surgery and bone grafting.
The techniques I will describe are affordable for most people with moderate to low income, assuming proper planning and financial payment plans are arranged. I feel that these techniques should be within the clinical ability of interested general dentists who are willing to obtain the necessary and relatively simple continuing education before placing the techniques into their practices.
What can a typical edentulous patient afford for oral treatment?
It has been my observation over many years of prosthodontic practice that some edentulous patients have more financial resources than their appearance indicates. I suggest that proper education be provided for all edentulous patients to increase their interest in seeking the procedures you provide. Equip your dental hygienists, assistants, and business personnel with adequate information and educational aids to allow them to provide patient education about the techniques you provide. This includes photos, models, DVDs, and other methods that will motivate patients to want what you deliver.
Educational models of the techniques I will discuss are available from Salvin (www.salvin.com), Imtec, a 3M Company (www.3m.com), and Zimmer/Sterngold (www.zimmerdental.com). Practical Clinical Courses has simple and inexpensive DVDs that educate patients on these overdenture treatments, which are discussed at the end of this article. After you have accomplished a few of the following techniques and taken photographs, you can use your digital photos of the patients you have treated to educate and motivate future patients.
The relatively inexpensive but highly successful techniques I will describe for edentulous patients include the following:
• (Figs. 2 and 3) Placement of two conventional-diameter implants, one each in the canine areas (implant diameter greater than 3 mm), an attachment on the implants, and an overdenture.
• (Figs. 4-6) Placement of at least four, one piece, small-diameter implants (SDIs) with spherical abutments, two implants at or near each of the canine areas or spread evenly from the canine-to-canine areas if bone presence permits (implant diameter less than or equal to 2.9 mm), and an overdenture.
Using fees averaged from American Dental Association and Limoli and Associates data, the 2011 cost to the patient would be estimated as follows. Your fees will undoubtedly vary from these averages:
• Two conventional-diameter implants — $1,800 x 2 = $3,600
• Four small-diameter implants — (There is no good data on fees for SDIs, but many dentists report that they charge about half the fee of a standard diameter implant.) $900 per implant x 4 = $3,600. (Some patients with minimal bone quantity and/or quality require more SDIs, but in my experience, most can be treated with either two conventional-diameter or four small-diameter implants on each arch. Some companies suggest four SDIs on the mandibular arch and six SDIs on the maxillary arch. Obviously, using more implants increases the cost of the procedure.)
• An overdenture — $1,300
• Total fee per arch — $4,900. Many patients do not need implants on their maxillary arch, since maxillary dentures are far more stable than mandibular dentures. In such cases, only the mandibular arch should be treated with implants. Occasionally and when needed, I make new maxillary and mandibular dentures for patients, placing implants only on the mandibular arch, and placing implants under the denture on the maxillary arch at a later time, thus spreading the cost of the procedures over a longer time.
Deciding to use small-diameter or conventional-diameter implants
This decision is based on several considerations:
• The bone present. If the patient has 6 mm of bone in a facial-lingual direction and 10 mm of bone in a coronal apical direction in the areas for the implants, conventional-diameter implants are usually my choice. However, this amount of bone is not often present in edentulous patients. SDIs can be placed in bony conditions having only 3 mm to 4 mm in a facial-lingual direction, and 10 mm in a coronal apical direction. In my opinion, SDIs are needed for many edentulous patients because of lack of adequate bone.
• The physical and mental condition of the patient. If the patient has adequate bone but is physically debilitated, as shown in Fig. 4, I may still decide to use SDIs, since their placement is not as traumatic and time consuming as when placing conventional-diameter implants.
• The patient’s attitude about bone grafting. If the patient does not have enough bone for conventional-diameter implants and resists having bone grafting, the obvious choice is SDIs.
Example steps to make a new implant-supported overdenture using conventional root form implants
Appointment 1: Diagnostic and treatment planning, including preliminary alginate impressions and making diagnostic casts.
Appointment 2: Place implants in canine areas. If loading the implants immediately, appointments 2 and 3 are combined. Many dentists prefer to load these conventional-diameter implants immediately, and I agree with that if the bone is very dense and the implants are stable at placement.
However, after making many of these restorations, I prefer to be conservative, placing the implants and waiting for integration before loading the two conventional-diameter implants. If waiting for the implants to integrate before loading, the patient wears a previous denture with soft denture liner (an excellent example is PermaSoft from DENTSPLY) in it for the integration period of three to six months, depending on bone density, anatomic position, and occlusion.
Osseointegration into the bone usually requires three to four months on the mandibular arch, or four to six months on the maxillary arch. If you are not loading the implants immediately, I suggest placing soft denture lining material into “wells” cut in the relieved previous denture, and having the patient wear the denture without attachment to the implants for the period of time described.
Appointment 3: Place the abutments on the two implants and make the final impressions for the prosthesis. This is done either as the implants are placed on appointment 2 or after a period of osseointegration as described in 2 above. The most popular abutments currently for conventional-diameter implants and overdentures are Locators, but ERA abutments and spherical abutments using rubber washer retention are also very popular.
Appointment 4: Determine the vertical dimension of occlusion and centric jaw relation in your normal manner.
Appointment 5: Try in the waxed-up trial denture for patient approval and evaluation of clinical acceptability. After the try-in, the respective portions of the abutments to be retained in the denture may be laboratory processed into the denture by the technician, or you may “pick-up” the abutments with resin after the denture is completed. I prefer to have the lab accomplish this task, thereby saving significant clinical time to “pick-up” the abutments.
Appointment 6: Seat and adjust the denture. Patients will now immediately recognize the positive influence of the implants and abutments. This is the moment they know why they need the implants.
Schedule subsequent adjustment appointments as needed. It has been my experience that one or two adjustment appointments are usually necessary for dentures made in this manner.
Example steps in making a new implant-supported overdenture using small-diameter implants
The steps are almost the same as the technique for conventional-diameter implants, but the technique for small-diameter implants is less difficult, faster, and more conservative. These suggestions relate to the most popular SDI brand, Imtec, a 3M company.
Appointment 1: Diagnostic and treatment planning, make preliminary impressions, and diagnostic casts.
Appointment 2: Place small-diameter implants and make final impressions. Almost always, the four or more SDIs can be loaded immediately as soon as the new denture is fabricated. Because there are four or more implants, they are somewhat splinted by the previous denture, which should be relieved internally in the area of the implants and lined with soft denture liner until the new denture is completed. That splinting concept is not as effective with only two conventional-diameter implant procedures described above, where considerable torque or occlusal forces can be placed on one or the other of the two implants placed only in the canine areas.
A good guide on whether or not to immediately load the SDIs is if the SDI implants require 30 or more Ncm to screw them into the bone, then load them immediately. However, if you have any question about their stability or the quality of the bone, or if the occlusion is heavy, do not load them. This makes a “well” in the previous denture, placing soft denture liner in the wells surrounding the implants, and letting the implants integrate for a period of weeks to months before loading.
Appointment 3: Determine the vertical dimension of occlusion and centric jaw relations in your normal manner.
Appointment 4: Try in the waxed-up trial denture for patient approval and evaluation of clinical acceptability.
Appointment 5: Seat the denture with the abutment housings cured into the denture. If you choose, the “pick-up” technique described in the previous conventional-diameter steps may be used. However, I prefer to have the housings cured into the denture by the lab technician.
Schedule adjustment appointments as needed.
Placing implants and using the patient’s previous denture as the final restoration
If you feel that the patient’s previous denture is adequate, you may elect to place the implants, conventional or small-diameter, under the old denture using the following procedure. I find that this technique is often the most desirable, since the patient is usually accustomed to the old dentures, which have inadequate retention and stability. The implants overcome those challenges.
Appointment 1: Diagnosis and treatment planning appointment.
Appointment 2: Place the implants and load or don’t load them, depending on the characteristics described previously. If loading them, put the abutments on the conventional-diameter implants and either make an impression for a rebase of the denture, including the abutment heads, or pick up the abutments in the old denture. If placing SDIs, I almost always load them the day they are placed or one day later if a rebase is being accomplished.
Appointment 3: This is needed only if rebasing and not picking up the abutment attachments. Seat and adjust the denture.
Adjust the denture base and the occlusion as needed at subsequent appointments.
Practical Clinical Courses has excellent nine-minute patient education videos that explain implants and help provide informed consent information for patients. Additional step-by-step continuing education videos for dentists are available that show how to place and restore both conventional and mini implants. We have many titles, including “Mini Implants for your Practice,” (V2317) and “Simplified Implant Surgery, 2nd Edition” (V2344). More information on these resources is available at www.pccdental.com.
What is the answer?
The answer to your question is relatively simple. If there is enough bone, I prefer to place conventional-diameter implants. If there is enough bone, as described, but the patient is debilitated, I prefer to place small-diameter implants instead. If there is not adequate bone quantity for conventional implants but the bone quality appears to be adequate, place small-diameter implants.
Conventional-diameter implants can be loaded immediately if the implants are solidly in place. Small-diameter implants placed under removable prostheses can usually be loaded immediately because there are twice as many small-diameter implants as conventional-diameter implants, and the additional number of implants limits movement of the denture, and therefore also limits movement of the implants. In my opinion, both conventional-diameter and small-diameter implants are very acceptable for enhancing retention and support for edentulous patients.
Dr. Christensen is a practicing prosthodontist in Provo, Utah. He is the founder and director of Practical Clinical Courses, an international continuing-education organization initiated in 1981 for dental professionals. Dr. Christensen is a cofounder (with his wife, Rella) and senior consultant of CLINICIANS REPORT (formerly Clinical Research Associates).


