Rubber dam: A key to better esthetic dentistry
Esthetic dentistry is arguably the most difficult type of dentistry we perform. Not only are expectations high (on both sides of the chair) but the techniques require an artful approach combined with a deep knowledge of material science, occlusion, phonetics, and pleasing smile characteristics. As clinicians, we will usually perform better when stress levels are lowered and expectations are realistic; however, the fact that esthetic dentistry is challenging remains.
One powerful method to reduce stress and improve outcomes is via rubber dam isolation. Unfortunately, most dentists have not had the practice-changing experience that comes with routine rubber dam use.1
Better material properties
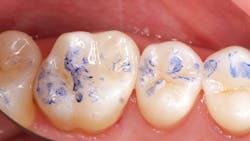
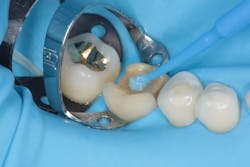
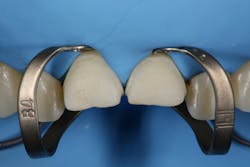
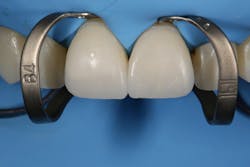
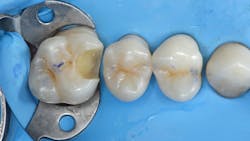
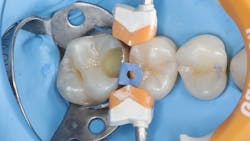
While performing esthetic dentistry, our bonding materials must work as promised to achieve long-term success.2 When manufacturers report bond strengths in the clinical arena, studies are conducted with the rubber dam in place (figures 1 and 2). When etched surfaces are exposed to the oral environment, including expired air while using typical isolation devices, the surfaces are challenged by moisture from numerous sources, causing the adhesive chemistry to be altered. Hence, to achieve the best bond strengths, a well-sealed barrier will help our results, often dramatically.
Successful cementing of zirconia crowns: Still a problem
Better visualization
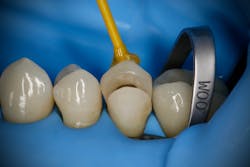
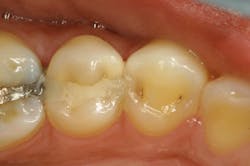
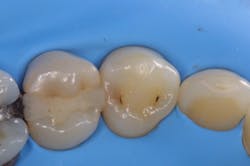
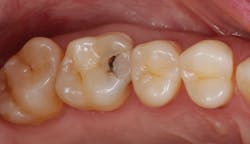
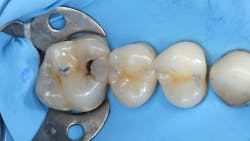
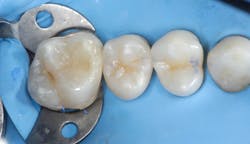
In addition to optimal bonding, the rubber dam may retract the tissues when placed properly, improving our visualization of finish lines, margins, and adhesive materials. One of dentistry’s rubber dam advocates, Dr. Hunter Brinker (the inventor of the B1-B6 clamps), often said “to see is to know” when referring to the benefits of the rubber dam to improve attention to detail through better visual access. It is interesting to note that when the rubber dam is properly placed, it will not only retract the tongue, lips, and cheeks, but it will also atraumatically retract the gingiva, typically 2–3 mm, and expose areas that could not be visualized by any other nonsurgical means (figures 3–5).
Let’s stop trying to “beat the blood”
After removing a two-week-old provisional, it’s a rare day that we don’t experience some minor inflammation of the soft tissues. Even with the best prototypes/provisionals and meticulous oral hygiene, gingival tissues will bleed, exude fluids, and generally cause problems when isolating teeth for adhesive delivery. With a direct composite, the existing decay is an irritant, and the best isolation device will not address the bleeding tissue adjacent to an extensive class II cavity.
With an inverted rubber dam, however, bleeding becomes a nonissue and allows the clinician to focus on preparation design, pulpal protection, adhesive strategies, and restoration placement—all in a clean and well-sealed environment.3 “Beating the blood” need not be your approach when one of dentistry’s least-used gems is close at hand (figures 6 and 7).
Rubber dam material
Several different types of dam materials exist today, including latex, latex-free, light, medium, and heavy consistencies in various sizes (5" x 5", 6" x 6") and attachment configurations (figure 8). I usually prefer a medium or heavy rubber dam (6" x 6" for adults) held securely with a metal frame and a soft protective napkin underneath.
Rubber dam retainers (aka clamps and retractors)
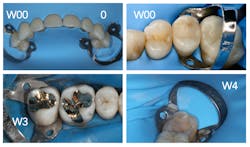
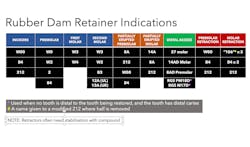
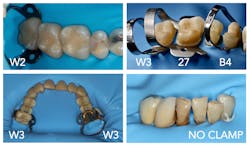
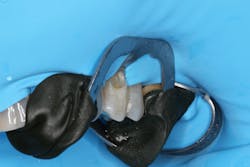
The common term “clamp” often does not properly explain the use of the rubber dam retainer. Most retainers are designed to hold the dam in place with the least amount of tissue harm possible (figure 9). Occasionally, more aggressive “clamps” may be employed when the soft tissue impedes access (like the 8A and 14A). However, the W3 is a useful clamp for routine molar isolations (figure 10).
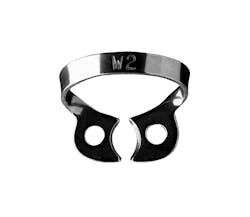
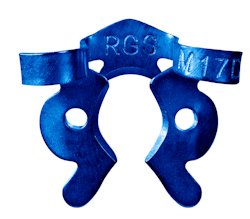
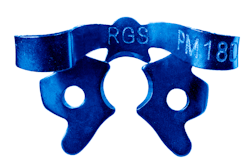
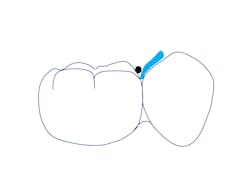
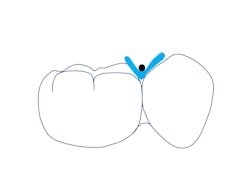
When you need additional isolation on the tooth to be clamped, the 27 provides excellent distal access. The M17D clamp uses a third set of jaws that are positioned apically on the distal to retract for extensive caries while simultaneously allowing the handpiece access to the lesions. The PM18D performs the same function when premolars have a missing adjacent distal tooth (figures 11 and 12). Occasionally maxillary second or third molars, which are triangular, are best isolated with a W2 clamp turned 45 degrees toward the midline.
The key to patient comfort is to avoid aggressive clamps like the 8A and 14A whenever possible. When using flat-jawed clamps like the W series, additional local anesthetic is rarely necessary. A chart on rubber dam clamp use is helpful when deciding which retainer to use (figure 13).
Clamp stability rule
For a clamp to be stable it must:
- Possess adequate tension (inherent spring clamping force)
- Be placed with four points of contact (the prongs must all touch the tooth)
- Be positioned below (apical) to the facial and lingual height of contour
Technique
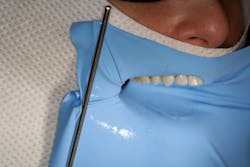
The goal is isolation of the field with ample access to all teeth being treated with a secured clamp and a completely inverted dam, creating a seal against moisture. The dam must extend beyond the upper and lower lip and not obstruct the nose. A napkin will serve to absorb moisture and provide the patient with increased comfort (figure 14).
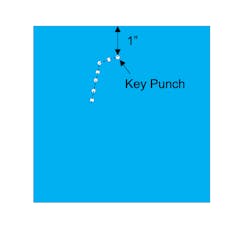
Maxillary rule: 1" from the top for incisors
When punching holes for the maxillary dam, start with the location of the central incisors, which will be one inch below the top edge of the dam. Continue marking the holes (this will be unnecessary after some practice, when eyeballing the location will become second nature). Pay attention to missing or rotated teeth, as well as spaces in edentulous areas. Adjust your hole spacing and positioning to accommodate these variations. Generally, we would like most rubber dams to extend beyond the final tooth being treated by at least one tooth when possible (figure 15).
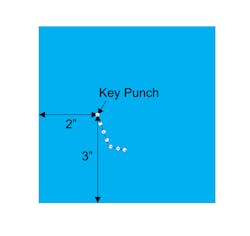
Mandibular rule: 2" x 3" intersection for first molars
For the mandibular isolation, it is wise to start at the 2" by 3" intersection of the 6" x 6" dam. Mark the hole for the clamped tooth here, and then extend straight toward the anterior before turning the corner at the canine. Generally, maxillary and mandibular dams for posterior isolation will extend to the midline. The nonclamp side may be secured with numerous techniques including dental floss, a small piece of rubber dam (a “bow tie”), or a commercially available alternative such as Wedjets from Coltene (figure 16).
Punching holes
Punching holes is dependent on the position of the desired isolation. The holes are generally about 6 mm (1/4") apart on center for both maxillary and mandibular isolations, except for the anterior mandible where the holes will be about 4 mm apart. When the holes are placed too far apart, the dam is difficult to place and tends to bunch up interproximally, leading to poor retraction and potential interference. When the holes are too close together, the dam may tear more easily during placement and the smaller septal area will not cover the tissue adequately, leading to leakage.
Securing the clamp
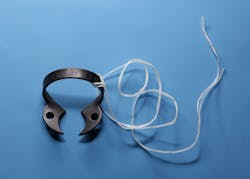
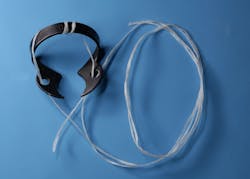
Clamps are small enough to be swallowed or aspirated. Clamps will fatigue after use and may break along the bow. Securing the initial clamp (no need for a secondary clamp as the patient is already protected by the dam) with dental floss through both holes and around the clamp is an effective and safe method (figures 17 and 18). Once the clamp is placed, the floss may be cut and removed if it impedes access.
Simultaneous application versus clamp first
Clamps without wings may be used with the simultaneous dam-clamp technique by simply placing the bow through the hole. Winged clamps may be secured along their lateral wings. The technique involves placing the dam and clamp together while securing the clamp on the retainer tooth.
This technique has the advantage of having the dam around the clamp from the onset, rather than trying to place the dam over a clamp that’s located distantly in the oral cavity. The disadvantage of the simultaneous technique is that securing the clamp with the clamp stability rule is more difficult. I’ve placed thousands of dams over nearly 40 years and have found that placing the clamp first leads to less tissue trauma and better compliance with the clamp stability rule.
Using a lubricant
Saliva is not a suitable lubricant. Local anesthetic is not a suitable lubricant. Vaseline isn’t either. It is highly recommended to use a mild soap in a small quantity on the underside of the dam. One of these products is Barbasol (brushless shaving cream), but other water-based lubricants and glycerin work reasonably well.
Passing the dam through the contacts
Resist the temptation to rely on the floss to pass the dam through the contacts. Instead, firmly stretch the dam thin and knife it through the teeth. Patience is key as the dam pushes gently on the teeth, and compression of the periodontal ligament allows for minor tooth movement and dam passage, often negating the use of floss on all but a few tough and tight contacts.
Flossing technique
The use of regular unwaxed floss is recommended. Prefloss the isolation area to remove debris and identify problem areas. Occasionally, an overcontoured or irregular restoration that’s planned for replacement should be disassembled before attempting rubber dam isolation.
Think about flossing the surface of the contact and not the dam. Pass the floss between the dam and the tooth, and then floss again with the tail of the floss before removing it. The tightest and most stubborn contacts can be successfully negotiated with this technique (figures 19 and 20).
Rinsing and drying
After the contacts have been navigated, the dam might have excess lubricant, saliva, and even blood present. Thoroughly rinse with water and follow with air spray. Even though we use a mild soap to lubricate the dam, patients don’t find this objectionable. In any case, a quick saliva ejector pass under the dam will eliminate any residual taste.
Inverting (no need to ligate teeth with floss)
The most important step to ensure a moisture-free dam that is well sealed and can retract the tissue is inverting the rubber dam. This step is performed after the dam has been flossed through the contacts and rinsed and dried. An explorer with air spray usually inverts most areas. When checking for inversion, floss the interproximals and hug the tooth while doing so; this will usually flip the dam over without inverting the explorer further.
Secondary clamps: W0, W00, B4, etc.
When an apically extensive lesion is present, a second clamp may provide significant additional retraction of the dam while exposing the lesion. Secondary clamps may be piggybacked with retainer clamps (figure 21). Often secondary clamps must be secured with compound or composite to maintain their position.
Use of compound
The 212 retractor is a secondary retractor-type clamp, and with few exceptions it must be secured during application. The dental assistant warms and softens the compound and tempers it in water before passing it to the dentist for insertion under and around the bow of the clamp. The cooled and hardened compound will secure the clamp and is easy to remove after the procedure (figure 22). Alternatively, a composite like Triad from Dentsply may be used to secure clamps.
Removing the rubber dam assembly
A small scissor like a Castroviejo is used to snip through the septal areas of the dam, which are stretched either facially or lingually before cutting. Care must be taken not to damage the tissues during this step; always visualize the entire scissor blade before cutting. The clamp is then removed with the dam, and the dam may then be spread out on a flat surface and inspected for missing segments. Missing pieces may be easily removed with a knot tied in dental floss. Patients will usually express relief that the dam is removed, but they wouldn’t want it any other way once they’re educated!
Practice makes proficient
After placing thousands of rubber dam isolations, some situations arise that make rubber dam isolation impractical or contraindicated. Severe gaggers, mentally and emotionally challenged patients, and certain tooth shapes and clinical crowns (delayed passive eruption and certain rare dental conditions) may make rubber dam application too arduous. However, it must be emphasized that lack of experience, low confidence, or poorly organized/equipped armamentaria are not reasonable contraindications.
The excuse that patients don’t want the dam simply hasn’t shown to be true; it’s been demonstrated that most patients prefer using the rubber dam for restorative procedures.4 We all learned how to use a rubber dam to some degree in dental school. It was the gold standard, yet in practice many discard the dam except perhaps for endodontics.
With practice and dedication, the application of the dam should take less than 60 seconds. It will become a second-nature procedure and one that will not only benefit patients but lower our stress levels, improve proficiency (efficiency plus excellence), and build a practice with satisfied patients.5 Esthetic dentistry is hard, but it may be less difficult when we realize the virtues of the rubber dam. We may think of the rubber dam as the “second assistant” in the operatory—one that is a lifetime dedicated employee of the dental practice (figures 23–28).
Editor's note: This article appeared in the February 2023 print edition of Dental Economics magazine. Dentists in North America are eligible for a complimentary print subscription. Sign up here.
References
- Hill EE, Rubel BS. Do dental educators need to improve their approach to teaching rubber dam use?J Dent Educ. 2008;72(10):1177-1181.
- Alqarni MA, Mathew VB, Alsalhi IYA, et al. Rubber dam isolation in clinical adhesive dentistry: the prevalence and assessment of associated radiolucencies. J Dent Res Rev. 2019;6(4):97-101. doi:10.4103/jdrr.jdrr_81_19
- Cochran MA, Miller CH, Sheldrake MA. The efficacy of the rubber dam as a barrier to the spread of microorganisms during dental treatment. J Am Dent Assoc. 1989;119(1):141-144. doi:10.14219/jada.archive.1989.0131
- Varghese A, Varghese T, Pradeep, et al. Patients’ satisfaction and attitude towards rubber dam usage: a literature review. ACTA Sci Clin Case Rep. 2022;3(4):1-8.
- Gergely EJ. Rubber dam acceptance. Br Dent J. 1989;167(7):249-252. doi:10.1038/sj.bdj.4806985
About the Author
Richard Gray Stevenson III, DDS, FACD, FAGD, ABOD
Richard G. Stevenson III, DDS, FACD, FAGD, ABOD, a 1986 graduate of the UCLA School of Dentistry, serves on the editorial board of Operative Dentistry, mentors dentists in clinically focused study clubs internationally, and lectures extensively on restorative dentistry. He is director of education at Stevenson Dental Education where he teaches hands-on clinical courses in general dentistry. Dr. Stevenson maintains a private practice in San Dimas, California. Contact him at [email protected], stevensondentalsolutions.com/, or check out his YouTube channel for videos on rubber dam isolation and other restorative topics at youtube.com/stevensondentalsolutions.
Updated January 19, 2023
