by Samuel M. Strong, DDS and Joseph J. Massad, DDS
For more on this topic, go to www.dentaleconomics.com and search using the following key words: hidden cost, removable overdentures, edentulous, Dr. Samuel Strong, Dr. Joseph Massad.
The removable implant overdenture has become a well–established option, if not the most preferred, for the edentulous patient. Critical to the success of this procedure is not only an accurate impression of the implant abutments, but also extremely vital is the detail of the entire edentulous ridges and the peripheral borders to maintain stability, retention, and deflect unwanted food entrapment around denture margins. Once this has been successfully accomplished, predictable jaw relation records should be taken and verified. New products and techniques have been developed to make both of these procedures more user friendly and economical for the clinician, due to reduced time combined with minimal postoperative care.
Previously, the dentist would make, or have made, a custom tray from an alginate impression of the edentulous arch. This generally requires an additional appointment to make the final impression. Requirements to fabricate a custom tray would be casting the impression and resin shaping on the model for a tailored tray. If the custom tray is made at the dental office, the estimated time and materials cost about $50. If the model is sent to a commercial dental lab, the total cost, without considering the inconvenience and time lost, ranges from approximately $50 to $80. (Dental Economics® Survey 2005.)
In addition to these hidden costs, the accuracy of the custom tray, particularly in the border areas, may be compromised due to the inherent characteristics of using alginate impression materials. Also, unless the person taking the impression, dentist or assistant, is experienced, the reproductions of the anterior and buccal vestibule may display distorted border vertical and/or horizontal anatomy and deficiencies in the palatal and load–bearing ridge areas. Compromised impressions of this sort inevitably result in inconsistent form and inaccuracy of the custom tray.
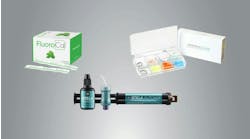
In the past, disposable trays were generally too flexible to support the current polyvinyl siloxane impression materials, and were not easily adaptable to the varying anatomical edentulous ridge shapes we encounter in the implant removable prosthodontic patient. The newly introduced DenPlant impression tray system (Global Dental Impression Trays, Inc., www.gdit.us) is specifically designed to provide anatomical accuracy and overcome many of the deficiencies associated with other disposable tray systems. Customization through heat molding is accomplished by rapidly passing a micro torch over the specified area of the tray for 5 to 10 seconds, thereby allowing the practitioner to bend the tray to the desired shape. Then it is placed in cold water to resolidify (Fig. 1). The chemistry of the tray material has virtually no memory and will retain the new shape and original stiffness. It becomes a custom tray by virtue of its capability to heat mold and bur trim.

The next critical step is obtaining an accurate jaw relation record. Historically, base plates are fabricated with wax rims to measure the vertical dimension of the patient and, once established, wax is removed from the posterior wax area to allow space for bite registration material. Obtaining a repeatable registration generally depends on the experience of the practitioner and proper management of the patient while taking this record. In a survey, 80% of the dentists polled at the Greater New York meeting in 2005 reported that this record was not predictable. When trying to manipulate edentulous patients to proper centric relation, these dentists reported jaw resistance from their patients and therefore difficulty in making a consistent jaw record. A new, disposable, easy–adjusting jaw relation recorder that eliminates the problem associated with wax occlusal rims was developed to solve many of the reported problems of obtaining proper jaw records.

Use of the new DenPlant impression tray and the newly introduced Jaw Relation Recorder System (by GDIT) are illustrated in the following case report.
Case report:
The patient, a 65–year–old male, had been wearing a removable, bar–retained overdenture for 10 years. Although he had been initially pleased with the appliance, the retention of the bar and attachments was diminished compared to its original condition. Moreover, the patient's overdenture required replacement due to acrylic staining, fatigue, and denture tooth wear, which resulted in less–efficient chewing.
After reviewing options with the patient for re–treatment of his case, we agreed to make the new overdenture without a bar for retention, and use direct abutments and attachments. The patient also desired a second, or spare, overdenture to use in the event of loss or needed repairs.
The existing bar (Andrews bar format) was removed, exposing the tops of all implants. Five out of the seven implant positions were used for the case. The two anterior implants were not needed for retention, which allowed additional room due to the inadequate inter–arch distance, which created problems for using abutments in those areas. Standard impression copings were inserted into the implants (Steri–Oss non–hexed, Nobel Biocare, Yorba Linda, Calif.) for a closed–tray, implant–level impression. The impression copings with most implant systems range from about 10 mm to 15 mm in length. The trough, or ridge area, of the DenPlant tray easily accommodates these dimensions, with adequate room for impression material. A panoramic radiograph confirmed the complete seating of the impression copings into all implants prior to the master impression making.
The tray was tried in first to confirm the appropriate size for use. The goal is to allow at least 2 mm of space between all edentulous and implant areas and the interior walls of the tray, which provides sufficient impression material thickness to prevent distortion of the elastomeric formula. In this case, the tray was heat molded in the posterior buccal flange area and bent outward slightly to provide the appropriate space of at least 2 mm for material inside the impression walls.This allows the elastomeric to cure according to specifications.

Polyvinyl siloxane impression material (Aquasil Ultra Fast Set, DENTSPLY Caulk, Milford, Del.) was used to complete the implant–level impression. The first of three steps includes placement of implant and tissue stops utilizing PVS rigid–body impression material placed in four sites within the impression tray: center of the palate, anterior midline, and right and left posterior ridge. With the PVS in these sites, the tray is inserted and held about 3 mm to 4 mm short of the vestibular sulcus until set (approximately three–minute set time) (Fig. 2). Metal retractors (Columbia, Miltex, York, Penn.) provide excellent access for entry of the tray intraorally. All border movements were accomplished using the Massad impression technique (anterior frenum, buccal vestibule, hamular frenum, postzygomatic space, and postpalatal zone areas).

The third and final step is the wash portion of the impression. The completed border molded material must be trimmed back about 1 mm from its periphery before initiating the final wash. Next, light–viscosity PVS is added to all areas of the peripheral row and then injected around the impression copings while medium–viscosity PVS material is placed in the trough corresponding to the implant impression copings simultaneously. The medium viscosity ensures the impression copings will pick up in the impression. The tray is now inserted into the mouth and all border movement registrations repeated. The impression is removed and inspected for accurate registration of the ridge, border areas, and implant copings prior to boxing and pouring the master cast (Fig. 3). These requirements are easily achieved using this technique and impression tray in about 15 minutes of chairtime.
The dental lab fabricated all appropriate record bases to follow the method. A facebow transfer for the SAM3 semiadjustable articulator (Great Lakes Prosthodontics, Tonawanda, N.Y.) was made. A Jaw Relation Recorder was used to register the patient's centric relation. This apparatus consists of an upper striking plate and lower striking pin mounted on maxillary and mandibular baseplates. This method eliminates the wax rim technique. When inserted intraorally at the proper vertical dimension, the patient is instructed to slide the jaw forward and back, then side to side. A tracing revealed as an arrow accurately identifies centric relation at the apex. Joining the two baseplates at this position with bite registration material results in the CR record ready to be mounted on the articulator for prosthetic set up (Figs. 4 and 5).
The desired mold and shade of the prosthetic teeth are selected (Vident Lingoform, Vident, Brea, Calif.) and arranged in a denture setup on the trial baseplates. After patient acceptance and final processing, metal housings and attachments (Locator, Zest Anchors, Escondido, Calif.) are cemented into the denture intaglio. The denture was made with the lingualized occlusion concept.
The locator abutments were placed into the five implant sites. The overdenture was then snapped into place with the attachments. Occlusion, phonetics, and esthetics were evaluated and approved by the dentist and patient. A metal framework had been cast and incorporated into the baseplate by the lab for strength. It is important to have the metal casting in place for the try–in appointment in order to evaluate the thickness of the eventual denture base, especially in the palatal area. The patient confirmed that the dimensions of the palatal and flange areas were comfortable and that his speech patterns were within normal limits. The patient had signed a processing approval form approving all aspects of the denture, and that any changes he might request after processing would incur additional fees.

Sufficient room was provided in the denture base intaglio to place the retentive elements intraorally. At the delivery appointment, all locator abutments were threaded into the implants and torqued to 20 NCm using the torque wrench (Nobel Biocare). The overdenture was inserted and proper seating confirmed.

ERA PickUp material (Sterngold, Attleboro, Mass.) was used to incorporate the metal housings and attachments accurately into the denture base. The metal housings and black processing attachments were seated intraorally onto each locator abutment. Rubber dams were positioned apical to and around the housing to prevent excess PickUp material from locking around the housing. A bonding agent to lute the urethane ERA PickUp material to the methyl methacrylate denture base was placed and light cured. The overdenture was then seated with self–cure composite resin and the patient was instructed to close completely to verify no change in vertical. The PickUp material self–cures in approximately 7 minutes. The overdenture was removed from the mouth and excess cured resin removed from the denture base. The overdenture was seated again for final inspection (Fig. 6).
The patient confirmed that he was able to place and remove the overdenture comfortably prior to dismissal. At subsequent followup appointments, minimal adjustments were necessary. The patient was then placed on a routine four–month hygiene maintenance schedule. The patient was thoroughly pleased both with the esthetic result and the retention of the overdenture.
The master impression procedure has thus been improved by reducing overhead and materials costs while eliminating the need for a traditional custom tray fabrication. The increased accuracy provided by the DenPlant impression trays can lower the dentist's case costs, reduce the numbers of appointments needed, and produce a superior impression for the master model.
The edentulous case is further facilitated by using the intraoral jaw relation device to procure centric relation records consistently, and reduce resets due to occlusal discrepancies. All of these new products translate into a more efficient series of appointments — less chairtime for the dentist, less resets for the laboratory, and a win, win, win for the patient, lab, and dentist.
Disclaimer: Drs. Strong and Massad are the patent holders of both the DenPlant Impression Trays and the Jaw Recorder Device.
Dr. Sam Strong received his DDS from Baylor College of Dentistry. He has been involved in implant prosthetics and teaching since 1985. Dr. Strong is the codesigner and codeveloper of the Massad Edentulous Impression Tray and the soon–to–be–released Strong–Massad DenPlant Impression Tray. He can be reached by e–mail at [email protected].
Joseph J. Massad, DDS, Director, Removable Prosthodontics, Scottsdale Center for Dentistry, has built an outstanding reputation as a leading expert in the field of removable prosthodontics, speaking before the American Dental Association, American Prosthodontic Society, Canadian Dental Association, and Federation Dentaire International. He may be reached via e–mail at [email protected].