Incorporating patient education in the digital planning and design of CAD/CAM restorative treatments
Digital dental techniques such as intraoral scanning, digital diagnostic wax-ups, and CAD/CAM milling have changed the way dentists educate patients about treatment plans, and consequently, how they provide quality restorative care. Powerful and efficient tools such as digital intraoral scanners and design software eliminate the need for traditional analog impressions and wax-ups, while stand-alone and complete CAD/CAM systems in today’s dental practices replace conventional hands-on fabrication processes.
As a result, patient information essential for treatment planning can be digitized, analyzed, and manipulated to design and plan treatments during a patient’s first consultation appointment. Such capabilities significantly enhance the patient experience and contribute to greater understanding of treatments and case acceptance.
Case presentation
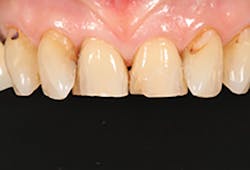
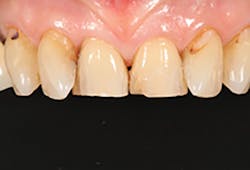
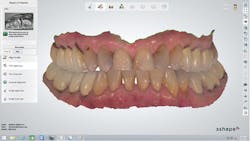
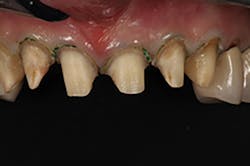
A 67-year-old female executive presented after becoming very self-conscious about the appearance of her anterior teeth (figure 1). During the consultation appointment, a thorough examination was performed, and scanned intraoral 3-D images and impressions (Trios, 3Shape) were obtained. Both arches and the bite registration were scanned (figure 2).
Figure 1: Preoperative retracted view of a female patient’s maxillary anterior teeth showing lingually positioned central incisors due to severe crowding of her arch
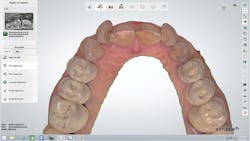
The scans were immediately evaluated chairside with the patient. When the maxillary scan was viewed from the occlusal aspect (figure 3), the extent of the rotation of her two lateral incisors became dramatically apparent to the patient. It was also pointed out and explained to her that both central incisors were positioned lingually due to the severe crowding of her arch.
Figure 2: Intraoral 3-D images and impressions of both arches and the bite registration were obtained and used to help plan and explain the treatment to the patient.
To correct this malpositioning and crowding, a consultation with an orthodontist was suggested. However, the patient declined this option due to its effect on her appearance and the long treatment time likely involved. Therefore, the laboratory technician joined the consultation to begin planning and designing a restorative treatment.
Figure 3: The extent of the rotation of the lateral incisors became dramatically apparent when viewing the maxillary scan from the occlusal aspect.
Digital treatment planning
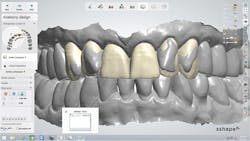
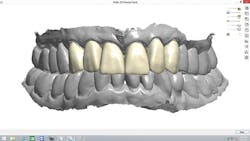
The laboratory technician worked with the color turned off to perform the restorative design quickly while the patient watched. The goal was to increase the length of the central incisors, bring them further labially, and reduce the labial position of the two lateral incisors (figure 4). Only minor changes were planned for the canines.
Figure 4: The goal of the digitally designed treatment plan was to increase the length of the central incisors, bring them further labially, and reduce the labial position of the two lateral incisors, with only minor changes planned for the canines.
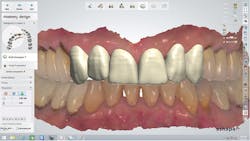
When the color was turned back on, the patient easily viewed and understood the 3-D digital diagnostic plan, which involved placing lithium disilicate (IPS e.max CAD, Ivoclar
Vivadent) crowns on teeth Nos. 6 through 11 (figure 5). The treatment goals were explained in a very efficient and effective manner, and understood by the patient. Major potential complications and the possibility of pulp exposure during tooth preparation of both laterals were also explained, after which the patient accepted the treatment plan and scheduled the first clinical appointment.
Figure 5: With the color turned back on, the patient easily understood the 3-D digital diagnostic plan.
Provisionalization and preparation
The restorative design that the patient accepted would be used in as many ways as possible for the treatment, including construction of the provisional crowns. The provisionals were milled in the practice prior to the first clinical appointment on a Zenotec select hybrid five-axis mill from PMMA blocks (Weiland) in shade B1 to a thickness of 0.8 mm. Because a shell technique was not being used, these provisonals would contribute to the enhanced strength and physical properties of the provisionals.
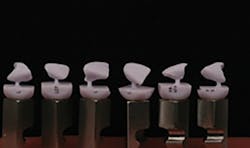
The milled provisionals were removed from the sprues and polished (figure 6). At the first clinical visit, the teeth were prepared and retraction cord placed to expose the crown margins (figure 7). Note that neither lateral incisor was exposed during tooth preparation.
Figure 6: The provisional restorations were milled from PMMA blocks in shade B1 on a Zenotec select hybrid five-axis mill, after which the sprues were removed and the provisionals polished.
Figure 7: At the first clinical visit, the teeth were prepared and retraction cord was placed to expose the crown margins.
Figure 8: After the patient approved the provisionals, they were recemented, scanned, and used to guide the restorative design.
The milled provisionals were used to confirm adequate tooth reduction to support the diagnostic plan. If the provisionals did not seat completely, the plan was to reduce preparations, rather than thin the provisionals (figure 8).
At this same visit, the counter was reused and articulated with a digital bite registration, confirming sufficient clearance given the patient’s anterior open bite. The provisionals were relined, polished, and cemented (figure 9). The patient was given an opportunity to “test-drive” the provisionals and verify that esthetics, speech, and function were acceptable.
Figure 9: The design files were sent to the PlanMill wet mill, and six monolithic lithium disilicate blocks in shade LT B1 were
used for milling the
six crowns.
Final restoration fabrication
Since the patient loved the appearance of the provisionals—which were an exact duplicate of the proposed restorations that she agreed to when accepting the treatment plan—no changes were made. Therefore, the provisionals were scanned for use as a prepreparation scan to guide the final restorative design, rather than using the tooth library contained in the 3Shape Dental Designer software.
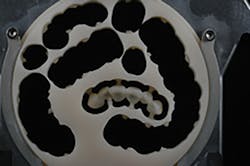
The design files were sent to the in-office PlanMill wet mill
(Planmeca), after which six monolithic lithium disilicate blocks in shade LT B1 (IPS e.max CAD, Ivoclar Vivadent) were milled into six crowns. Simultaneously, a model was ordered from Dental Arts Laboratory that would be printed using a Varseo printer (Bego).
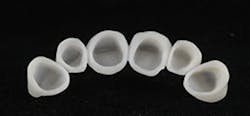
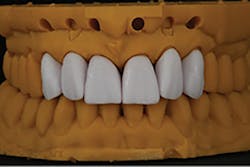
The milled restorations were seated on the 3-D printed model in order to check the surface texture and view the arrangement of the six monolithic units (figure 10). The crowns were then crystallized and polished.
Figure 10: A 3-D printed model was used to check the surface texture and view the arrangement of the six monolithic units, after which they were crystallized and polished.
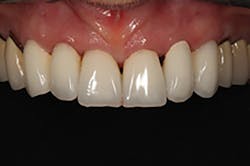
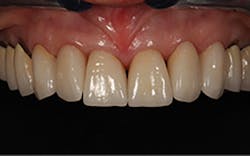
At the third clinical visit, the provisionals were removed, the preparations cleaned, and the final restorations cemented, without the need for contact or occlusal adjustments (figure 11). The patient was delighted with the outcome, which precisely duplicated the proposed treatment plan that was the basis for the provisional restorations she’d previously worn and the definitive restorations (figure 12).
Figure 11: Postoperative close-up retracted view of the cemented crowns
Figure 12: View of the original treatment plan that was the basis for the definitive restorations in Figure 11, as well as the provisional restorations shown in Figure 8
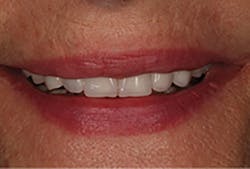
Figure 13: Postoperative facial view of the six CAD/CAM crown restorations
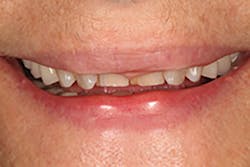
Figure 14: View of the patient’s original smile appearance, which was greatly enhanced by the CAD/CAM restorations, as planned in Figure 5; duplicated and evaluated in provisionals, as shown in Figure 8; and precisely created in the definitive treatment in Figure 13
Conclusion
In the author’s experience, using Trios to create a “digital diagnostic wax-up” is far more effective for communicating a treatment plan than a traditional diagnostic wax-up. Patients are usually distracted by the color and confused with right and left, and they have trouble simultaneously viewing pretreatment and wax-up casts. In the case described here, explaining the treatment plan to the patient was enhanced by showing that her original tooth position appeared in gray, and the restorative plan appeared in white, which helped her immediately understand the plan. Additionally, reviewing the occlusal view dramatically demonstrated the planned correction to the original crowded position of her teeth (figures 13 and 14). However, one of the most noteworthy aspects of the digital diagnostic wax-up approach is the exact similarity between the diagnostic design, provisional restorations, and definitive restorations. Until now, no technology has ever enabled this level of precision and predictable duplication.
Author’s note: The author would like to acknowledge the efforts of one of his practice’s in-house technicians who did the case, Mr. Pasquale Fanetti.
Jonathan Ferencz, DDS, facp, is a clinical professor of postgraduate prosthodontics at New York University.
