Content Dam De Print Articles Volume 107 Issue 6 1706degoo P01

Final impressions: Accuracy, confidence, and material selection

June 1, 2017
As technology evolves, Dr. Goodchild looks at key components to success when selecting impression materials. He then provides a case study using Aquasil Ultra+ Smart Wetting Impression Material from Dentsply Sirona.  
As technology evolves, Dr. Goodchild looks at key components to success when selecting impression materials. He then provides a case study using Aquasil Ultra+ Smart Wetting Impression Material from Dentsply Sirona.

Not capturing an accurate final impression is a full stop in the single-unit crown procedure. Recent trends, including the use of retraction pastes, increasingly faster-set impression materials, and use of lower cost impression materials, have created a confusing milieu that can complicate the final impression procedure. This article will discuss three key components of successful final impressions and present an illustrative case study.

When evaluating impression materials, three components are key to success. First, to capture accurate and precise details, impression materials used intraorally need to work in the presence of moisture (i.e., be hydrophilic) not just when cured, but more importantly when they are uncured. Second, impression materials must be strong at the time of removal from the mouth to prevent tearing. Impression material that is syringed into a sulcus results in thin sections of material. Unless adequate retraction is achieved in these areas, the thin extensions of impression material can be at greater risk of tearing when the impression is removed. Third, appropriate material selection is key to the success of the final impression, and no single impression material will satisfy the infinite number of clinical situations. A fast-set material may be ideal for single-unit cases, but larger prosthetic cases or removable denture impressions may require options for setting times and viscosities.

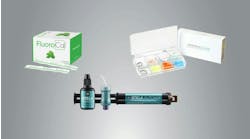
In my practice, I’ve recently switched to the new Aquasil Ultra+ Smart Wetting Impression Material (Dentsply Sirona; figure 1), as it was designed to help clinicians in these three key areas: accuracy, confidence, and material selection.

Figure 1: Aquasil Ultra+ Smart Wetting Impression Material" title="Figure 1: Aquasil Ultra+ Smart Wetting Impression Material">Figure 1: Aquasil Ultra+ Smart Wetting Impression Material
Clinical Case Example

A 32-year-old female presented for a full-coverage restoration on tooth No. 3. After local anesthesia was achieved, the tooth was carefully prepared to meet the reduction guidelines for Celtra Duo ZLS (Dentsply Sirona), a zirconia-reinforced lithium silicate material. In this case, a 1 mm circumferential shoulder was created with axial wall and occlusal reductions of 1.0-1.5 mm and 1.5 mm, respectively (figures 2 and 3).

Figure 2: Preparation of tooth No. 3 using a high-speed handpiece and shoulder diamond bur to achieve the manufacturer’s minimum reduction guidelines for Celtra Duo ZLS (i.e., 1 mm circumferential shoulder with axial wall and occlusal reductions of 1.0-1.5 mm and 1.5 mm, respectively)" title="Figure 2: Preparation of tooth No. 3 using a high-speed handpiece and shoulder diamond bur to achieve the manufacturer’s minimum reduction guidelines for Celtra Duo ZLS (i.e., 1 mm circumferential shoulder with axial wall and occlusal reductions of 1.0-1.5 mm and 1.5 mm, respectively)">Figure 2: Preparation of tooth No. 3 using a high-speed handpiece and shoulder diamond bur to achieve the manufacturer’s minimum reduction guidelines for Celtra Duo ZLS (i.e., 1 mm circumferential shoulder with axial wall and occlusal reductions of 1.0-1.5 mm and 1.5 mm, respectively)
Figure 3: Final preparation of tooth No. 3 for Celtra Duo ZLS crown" title="Figure 3: Final preparation of tooth No. 3 for Celtra Duo ZLS crown">Figure 3: Final preparation of tooth No. 3 for Celtra Duo ZLS crown

A small amount of Aquasil Ultra+ XLV Fast Set (extra light body) wash material (Dentsply Sirona) was bled outside the mouth, and then immediately syringed around the moist preparation using a Digit cartridge system (Dentsply Sirona; figure 4). Care was taken to syringe the wash material twice around the preparation while keeping the intraoral tip submerged in the material to avoid air entrapment and bubbles.

Figure 4: Wash material is syringed around tooth No. 3 using the Digit Targeted Delivery System. Note: Syringe the wash material from margins to occlusal/incisal surface, keeping syringe tip within impression material during delivery, and push material forward while moving around the tooth." title="Figure 4: Wash material is syringed around tooth No. 3 using the Digit Targeted Delivery System. Note: Syringe the wash material from margins to occlusal/incisal surface, keeping syringe tip within impression material during delivery, and push material forward while moving around the tooth.">Figure 4: Wash material is syringed around tooth No. 3 using the Digit Targeted Delivery System. Note: Syringe the wash material from margins to occlusal/incisal surface, keeping syringe tip within impression material during delivery, and push material forward while moving around the tooth.

The closed-bite tray containing Aquasil Ultra+ Heavy tray material (Dentsply Sirona) was then seated within the wash material’s 35-second working time to help prevent mixing errors that can result in pulls or drags within the impression, causing poor detail reproduction (figure 5). After waiting the minimum removal time - in this case, two minutes and 30 seconds from the start of mix - the impression was removed from the patient’s mouth and evaluated (figure 6).

Figure 5: Seat the closed-bite impression tray filled with Aquasil Ultra+ Heavy impression material within the 35-second working time of the wash material to prevent mixing errors." title="Figure 5: Seat the closed-bite impression tray filled with Aquasil Ultra+ Heavy impression material within the 35-second working time of the wash material to prevent mixing errors.">Figure 5: Seat the closed-bite impression tray filled with Aquasil Ultra+ Heavy impression material within the 35-second working time of the wash material to prevent mixing errors.
Figure 6: Evaluating the completed Aquasil Ultra+ final impression" title="Figure 6: Evaluating the completed Aquasil Ultra+ final impression">Figure 6: Evaluating the completed Aquasil Ultra+ final impression

Approximately two weeks later, the patient returned for delivery of the final Celtra Duo restoration on tooth No. 3. The provisional was removed and the tooth preparation cleaned of excess cement. After treating the intaglio of the restoration according to the manufacturer’s instructions and creating an isolated environment for adhesion, a thin uniform amount of Calibra Universal Self-adhesive Resin Cement (Dentsply Sirona) was applied to the inside of the crown, and the restoration was immediately seated onto the tooth (figure 7). In this case, tack curing and removal of excess cement were accomplished after five seconds of light curing on both the buccal and lingual surfaces (figure 8). Once cleanup and final set of the cement was complete, final occlusion and interproximal contacts were checked and the patient was released (figure 9).

Figure 7: Applying a thin layer of Calibra Universal Self-adhesive Resin Cement to the inside of the final crown" title="Figure 7: Applying a thin layer of Calibra Universal Self-adhesive Resin Cement to the inside of the final crown">Figure 7: Applying a thin layer of Calibra Universal Self-adhesive Resin Cement to the inside of the final crown
Figure 8: Using a Smartlite Focus (Dentsply Sirona), the excess cement on tooth No. 3 is tack cured from the buccal and lingual for five seconds to facilitate easy cleanup." title="Figure 8: Using a Smartlite Focus (Dentsply Sirona), the excess cement on tooth No. 3 is tack cured from the buccal and lingual for five seconds to facilitate easy cleanup.">Figure 8: Using a Smartlite Focus (Dentsply Sirona), the excess cement on tooth No. 3 is tack cured from the buccal and lingual for five seconds to facilitate easy cleanup.
Figure 9: Following tack curing, the Calibra Universal cement has achieved a gel state, and excess material is easily removed from the marginal and interproximal areas." title="Figure 9: Following tack curing, the Calibra Universal cement has achieved a gel state, and excess material is easily removed from the marginal and interproximal areas.">Figure 9: Following tack curing, the Calibra Universal cement has achieved a gel state, and excess material is easily removed from the marginal and interproximal areas.

Jason H. Goodchild, DMD, is chairman of the Department of Diagnostic Sciences at the Creighton University School of Dentistry in Omaha, Nebraska, and a clinical education manager for Dentsply Sirona Restorative.

Sponsored Recommendations

Clinical Study: OraCare Reduced Probing Depths 4450% Better than Brushing Alone

Good oral hygiene is essential to preserving gum health. In this study the improvements seen were statistically superior at reducing pocket depth than brushing alone (control ...

Clincial Study: OraCare Proven to Improve Gingival Health by 604% in just a 6 Week Period

A new clinical study reveals how OraCare showed improvement in the whole mouth as bleeding, plaque reduction, interproximal sites, and probing depths were all evaluated. All areas...

Chlorine Dioxide Efficacy Against Pathogens and How it Compares to Chlorhexidine

Explore our library of studies to learn about the historical application of chlorine dioxide, efficacy against pathogens, how it compares to chlorhexidine and more.

Whitepaper: The Blueprint for Practice Growth

With just a few changes, you can significantly boost revenue and grow your practice. In this white paper, Dr. Katz covers: Establishing consistent diagnosis protocols, Addressing...