Minimally invasive veneer restoration with ceramic-based restorative material
Dr. Mauricio Watanabe
Cirurgiao-dentista
Esthetics is an aspect that now plays an important role in modern dentistry. As more and more patients desire a "perfect smile," dentists are increasingly called upon to produce highly esthetic restorations and optimize the natural situation. Reshaping of the teeth is a safe procedure with a predictable result that can be routinely performed to create a more appealing and harmonic smile. However, it requires corresponding diagnostics and treatment planning that take both esthetic and functional aspects into consideration.
Also essential are the employment of minimally invasive techniques to preserve the tooth substance and neighboring structures, along with the use of dental materials boasting the highest possible stability and biocompatibility. Restorations made from indirect composite veneers are one possible treatment.
Clinical Case
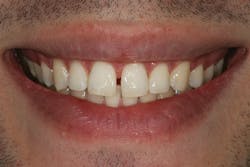
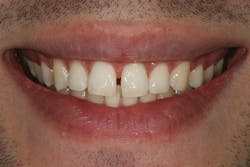
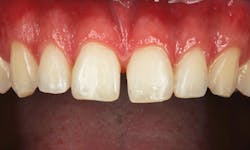
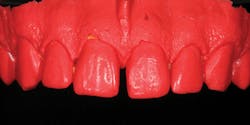
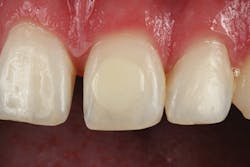
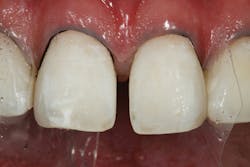
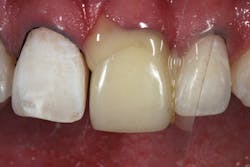
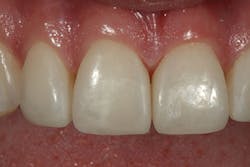
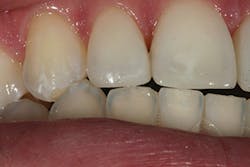
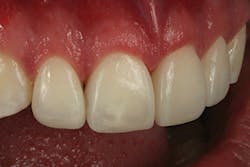
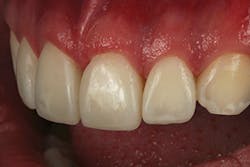
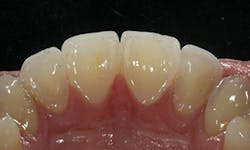
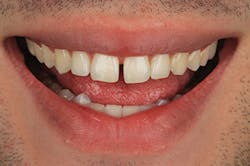
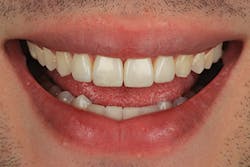
A 20-year-old patient wanted to improve the esthetics of his smile (figure 1). Clinical examination revealed a diastema between the maxillary central incisors (figure 2). The patient wanted a quick solution without the necessity of orthodontic treatment. By analyzing the photographs of the patient's face, we were able to establish that the line running along the incisal edges and cusp tips of the canines in the maxillary anterior teeth did not form a regular curve. To get an attractive smile, it was thus necessary to adapt the shape of all four maxillary incisors in such a way that they formed a positive smile line (figure 3). During the lateral movements, there was no contact between the mandibular anterior teeth and maxillary incisors, opening up the possibility of lengthening them.
Figure 1: A 20-year-old patient presented for dental treatment for esthetic reasons due to a diastema between his maxillary central incisors.
Figure 2: The intraoral view shows the positions of the anterior teeth and their morphology in more detail.
Figure 3: We established that the four maxillary incisors would need to be treated if we were to achieve a satisfactory result.
As the patient was young, a minimally invasive technique was required, which is why we decided on a procedure in which preparation of the teeth is not essential. We chose an indirect technique in which the restorations were made from Admira Fusion (Voco), a material containing a ceramic matrix instead of the conventional methacrylate-based monomers, making it highly biocompatible. The use of indirect veneers produced by the dentist represents an alternative to prefabricated veneers. Producing the veneers yourself also offers further advantages such as low cost, the possibility of personalizing the tooth shape, reduced thickness of the cement layer, and an improved marginal seal.
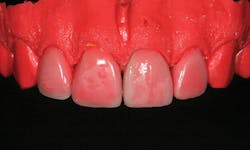
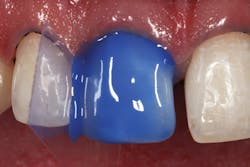
Use of a mock-up, the basis of which was produced with die silicone (Voco) in this case (figure 4), is advantageous for the simple and quick fabrication of indirect restorations. The corresponding shade for the restorative was selected in the first treatment session. This was done by applying a small quantity of each of the possible shades to the vestibular surface of one of the teeth to be restored and curing it. After comparing the shades, we decided on A1 (figure 5).
Figure 4: As a treatment method, we selected the production of indirect restorations on a silicone model. This has advantages over the use of prefabricated facets, as producing them in-house allows for customization and achievement of a better marginal seal.
Figure 5: We selected a shade in the first treatment session by applying a small quantity of the material to the tooth, smoothing off the surface with a large metal spatula, and then curing the material. In this case, we decided on A1.
Figure 6: The restorative material (Admira Fusion, Voco) was applied directly to the finished silicone model. Spatulas were used to model the teeth in accordance with the morphology of the corresponding group of teeth. In this case, veneers were to be used to restore a proper curve to the line connecting the cusp tips of the canines and the incisal edges.
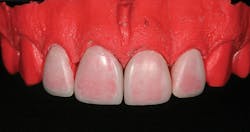
Figure 7: Following polymerization, we removed the veneers from the model, finished them, and polished them with rubber grinders/polishers for ceramic restorations.
Figure 8: Superimposing a photo of the finished veneers with a photo of the patient allowed us to predict position and size of the restorations in the finished treatment.
Figure 9: The simulation can be better assessed in a black and white photograph, as seen here.
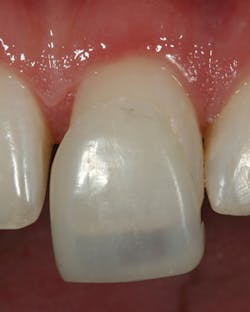
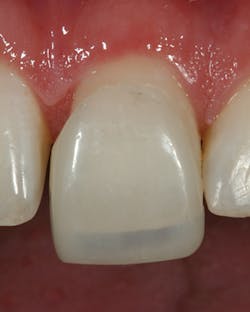
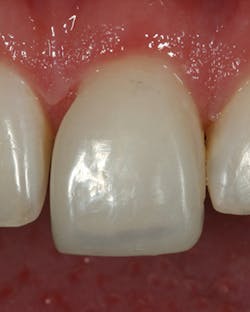
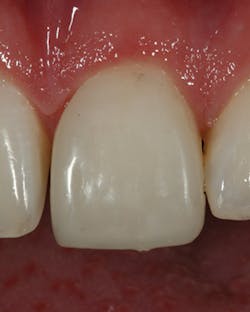
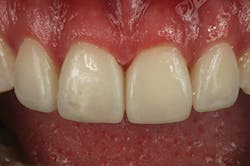
Figures 10-13: Try-in of the veneer on tooth No. 9. Note the direction of insertion. It is important to observe the direction of insertion precisely when determining the order for inserting the restorations, as no preparation was performed.
Figure 10
Figure 11
Figure 12
Figure 13
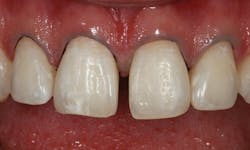
Figure 14: We used 000 retraction cords to retract the gingival margin for all the maxillary incisors.
Figure 15: An application of 37% orthophosphoric to each tooth is allowed to act for 15 seconds. The neighboring teeth are protected with a separating strip made of polyester.
Figure 16: Teeth Nos. 8 and 9 following etching with phosphoric acid and drying.
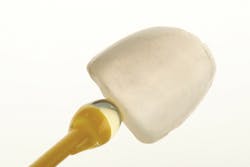
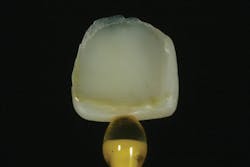
Figure 17: The veneer for tooth No. 9. It has been sandblasted with aluminium oxide to clean the interior surface.
Figure 18: Following application of the adhesive and drying with an air stream, the flowable composite GrandioSO Flow (VOCO) in shade A1 was used.
Figure 19: View following placement of the restoration. We also removed all material excesses with a No. 5 probe prior to polymerization.
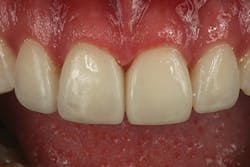
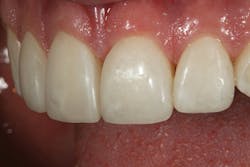
The restorative material was applied to the silicone model with a metal spatula for production of the actual mock-up and, thus, also for the veneers (figure 6). During this step, it is important to try to stick to the planning specifications compiled based on the photo analysis. The aim was, therefore, to lengthen the maxillary incisors. Light-curing was followed by finishing and polishing with rubber polishers (figure 7). We then photographed the model and superimposed the image with a photo of the patient smiling in order to check whether the size and alignment of the teeth had been successful (figures 8 and 9).
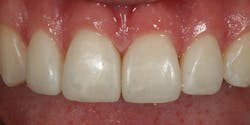
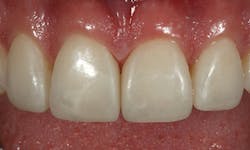
The veneers were adapted directly to the patient's teeth (figures 10-13). A considerable advantage of this technique is the possibility of checking whether the result will satisfy the expectations before the treatment is completed. Trying in the restorations also allows the patient to see the result and request any changes to be made. Once the marginal seal was checked and the patient was happy with the esthetics achieved, preparations were made for placing the indirect veneers. We chose the adhesive Futurabond U (Voco) in combination with the flowable composite GrandioSO Flow (Voco) in shade A1 for the luting.
The gingival margin was retracted with a No. 000 retraction cord (figure 14), and 37% orthophosphoric acid was applied to the teeth for 15 seconds (figure 15). Following rinsing with water and drying of the etched vestibular surfaces (figure 16), the adhesive was applied, the solvent dried with an air stream, and light-curing was performed for 10 seconds. The interior surfaces of the veneers were sandblasted with aluminium oxide (90 μm) at a pressure of 60 psi in order to clean and roughen the surface. The homogeneous, clean surface of the interior of the veneer is evident when viewed against the light (figure 17). In the next step, the adhesive was applied to the same surface and then dried with a light air stream.
We then distributed a small quantity of flowable composite on the surface (figure 18) and placed the veneer on the corresponding tooth (figure 19). Following application, the excess composite was removed and then light polymerization performed.
Figures 20-24: Various views of the veneer restorations following completion.
Figure 20
Figure 21
Figure 22
Figure 23
Figure 24
Figure 25: Contact between the anterior teeth during the protrusive movement.
Figures 26-27: Following grinding of the veneers, there was no further contact between the anterior teeth during the lateral movements.
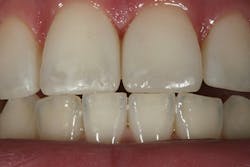
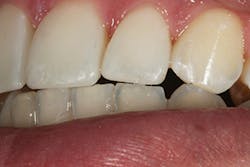
Once all veneers were in position, the restoration margins were finished with a No. 15C scalpel and polished with rubber polishers. We assessed the results immediately upon completion (figures 20-24). Corresponding grinding was carried out to ensure there was even contact between the mandibular incisors and maxillary central incisors during the protrusive movement (figure 25). Grinding was also employed to eliminate all contact between the veneers and the mandibular teeth during lateral movements (figures 26 and 27).
Figures 28-29: Figures of the veneers under indirect light. The details are clearly visible.
Figures 30-31: View of the anterior teeth with a harmonic curve from vestibular and palatal perspectives.
Figures 32-33: A clear improvement in the tooth esthetics can be seen when the preoperative and postoperative views are compared.
Figures 34-36: A comparison: The patient's smile before and after.
Figures 34 and 35
Figure 36
Finally, views from vestibular and palatal under indirect light revealed that the details were well elaborated and that the indirect restorations blended harmoniously into the neighboring structures (figures 28-31). A comparison of the preoperative and postoperative views shows a clear improvement of the tooth esthetics (figures 32 and 33)-and the positive effect this has had on the patient's smile (figures 34-36).
Dr. Mauricio Watanabe, cirurgiao-dentista, is a Brazilian dentist who graduated from Universidade Estadual Paulista in Araçatuba. He received a master of science degree from Faculdade de Odontologia e Centro de Pesquisas Odontológicas São Leopoldo Mandic. He specializes in periodontics and oral and maxillofacial surgery, serves on the editorial board of the International Journal of Esthetic Dentistry, and has presented numerous courses on esthetic dentistry around the world.
