What are the best types of abutments for implants?
Q I occasionally have screws that are holding abutments in place over implants come loose. Although this has not been a frequent occurrence, when it happens it is disruptive to the practice day because I don't know if I can get the crown off the abutment. You helped me in your Dental Economics article in Dec. 2013 by showing a technique to remove a crown cemented over an abutment. My current question is different. When should a crown be connected to the implant by screwing through the crown, and when should a separate abutment be used with the crown cemented onto the abutment?
A This question has an interesting historical perspective that I will briefly review to allow better understanding of my answer. The original "root form" implants used many years ago were intended for multiple tooth replacements, with the implants connected by a metal framework supporting a resin denture base, and with resin teeth in the denture base, a so-called "hybrid denture." Using current terminology, we could identify that type of prosthesis as "all on six" as compared to the currently popular "all on four" concept.
Internal anti-rotational features inside the implant body were not available at that time. The original root-form implants had a very short hexagonal projection protruding coronal to the implant body or no anti-rotational feature at all. The short hexagonal metal piece extending coronal to the implant was intended primarily for rotation of the implants into place, and not to resist rotation of the abutment.
However, dentists began to place implants to replace single teeth, and there were significant challenges connecting crowns to the single implants, which were originally intended to be connected to one another without a rotational risk.
Later, internal anti-rotational features were patented by one company, and the single-tooth replacement problem was solved for that company. However, the patent had to run out before other companies could incorporate internal anti-rotational features.
Single-piece implant and abutment combinations were not feasible most of the time because bone angulations that were not in the long axis of the tooth being restored would not allow proper crown anatomy. As a result, manufacturer-made abutments and custom-made abutments evolved that allowed them to be placed in proper angulation, and they became the primary abutments for single crowns placed over abutments. The resultant four-piece (implant, separate abutment, screw, and crown) concept is the most-used single-tooth abutment concept.
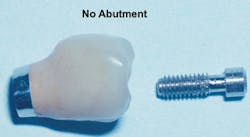
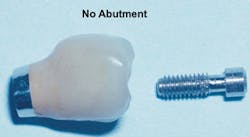
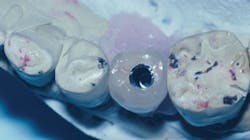
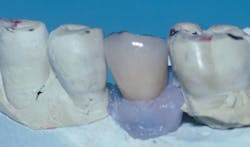
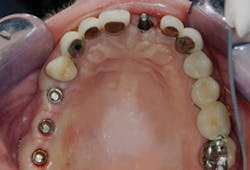
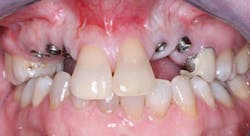
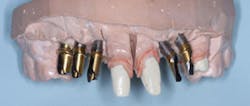
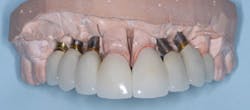
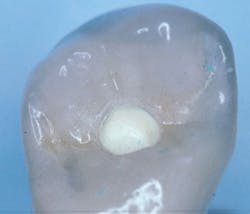
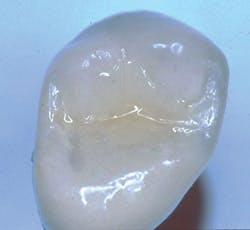
Recently, dentists and laboratory technologists have asked themselves why they were making separate abutments when many clinical situations allow use of a three-piece combination (implant, crown, and a screw through the crown into the implant) without a separate abutment. (Figs. 1-3)
FIG. 1 -- Porcelain-fused-to-metal crown to be screwed directly to implant.
FIG. 2 -- Crown on working cast. Note screw to be placed in hole through crown. Some patients object to the discoloration of the occlusal surface caused by the screw hole. Suggestions on how to restore the hole are included in this article.
This article discusses why the three-piece concept is often better than the four-piece, when it cannot be used, how best to hide the esthetically unacceptable hole necessary for screw access, and what to do when the screw comes loose from the two-piece implant crown combination.
Observe the implant abutments in Fig. 4. The three in the posterior area have had separate abutments placed on them, each with a screw holding the abutment in place on the implant. That technique was not necessary. The implants are approximately in the center of the crowns to be placed over them, and they are nearly perpendicular to what will become the occlusal plane. They could easily have had crowns screwed directly to the implants without a separate abutment. When observing the central incisor with an unaltered manufacturer-made abutment, it is apparent that the abutment is too far facial and will require significant reduction to allow proper thickness of the porcelain-fused-to-metal crown to be placed. Because of this usual bone anatomy angulation in the anterior maxilla, the central incisor is a candidate for a custom abutment, and a four-piece restoration with the crown cemented to the separate abutment.
When the three-piece concept should not be used (crown screwed onto the implant concept without a separate abutment)
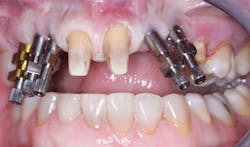
Observe Figs. 5-10 for a classic example of when crowns cannot be screwed onto abutments. The patient did not want to have bone grafting, and the implants were placed where there was minimally adequate bone. These implants were placed by a very competent periodontist. The significant angulation of the implants from the optimum angulation is easily observed with the impression copings on the implant bodies in Fig. 6. Custom abutments were mandatory, as shown in Fig. 6. The resultant crowns (Figs. 9-10) created a very acceptable esthetic result. It is very obvious that if crowns had been screwed onto the implants without an abutment, the screw entry would have been through the facial or incisal portion of the crowns.
FIG. 5 -- Implants placed in residual bone that was not at optimum angulation.
FIG. 6 -- Impression copings showing angulation of implants.
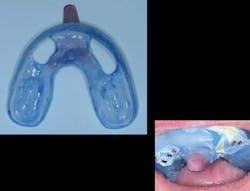
FIG. 7 -- An open impression tray was required because of the severely nonparallel placement of the implants.
FIG. 8 -- Custom abutments were required for this patient because of the implant placement angulation.
FIG. 9 -- The crowns on the custom abutments.
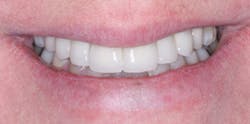
FIG. 10 -- A happy patient. This patient could not have screws through the crowns because the angulation of the implant placement would have led to screw holes coming through the facial surfaces of the crowns.
How to hide the esthetically unacceptable screw hole leading to the implant body
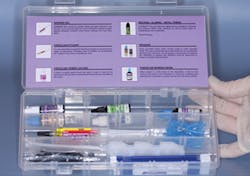
Figs. 11-13 show how to effectively fill the screw access hole. The Bisco repair kit or other similar materials can adequately fill the hole with an acceptable esthetic result as shown in Fig. 13.
FIG. 11 -- Bisco Intraoral Repair Kit is an excellent choice for filling the hole.
FIG. 12 -- Complete placement of screw – place a small piece of dry cotton, plumber's tape, gutta percha, or other soft material in the depth of the hole, and place opaque from the kit over the soft material.
What to do if the screw comes loose
Repairing a loose screw is not a problem when placing a screw through the crown. The occlusal access hole is easily opened. Be careful not to abuse the ceramic around the hole. Remove the screw and observe it. Replacing it with a new screw is a good option since having the crown loose on it may have traumatized or weakened the screw. Clean out the screw hole in the implant. Some recommendations for disinfecting it are chlorhexidine gluconate such as Ultradent Consepsis disinfecting solution, or glutaraldehyde such as MicroPrime from Danville Materials. Repeat the procedure described for filling the hole. This entire procedure usually requires only about 15 minutes, and it does not have the uncertainty of attempting to remove a crown cemented over a screwed-on abutment.
Conclusion
It is obvious that connecting crowns to implants is changing from using a separate screwed-on abutment and a crown cemented over it, to placing a screw through the crown without a separate abutment._______________________________
More by Gordon Christensen, DDS, MSD, PhD:
- Ask Dr. Christensen: Can you successfully bleach striated tetracycline stains?
- Ask Dr. Christensen: Should teeth serving as fixed partial denture abutments have implant posts?
- Ask Dr. Christensen: What are the major needs for small-diameter implants?
_______________________________
Gordon Christensen, DDS, MSD, PhD, is a practicing prosthodontist in Provo, Utah. He is the founder and director of Practical Clinical Courses, an international continuing-education organization initiated in 1981 for dental professionals. Dr. Christensen is a cofounder (with his wife, Dr. Rella Christensen) and CEO of CLINICIANS REPORT (formerly Clinical Research Associates).
In this monthly feature, Dr. Gordon Christensen addresses the most frequently asked questions from Dental Economics® readers. If you would like to submit a question to Dr. Christensen, please send an email to [email protected].
Another very popular video is "Dr. Christensen's Clinical Failures and How to Avoid Them, Edition 2," Video V4757. This has saved many dentists from the frustrations of clinical failures.
Both videos will save you time, effort, and money, as well as please your patients. We also welcome you to one of our two-day hands-on courses in Utah on every aspect of dentistry, including implants.
Go to www.pccdental.com or call 800-223-6569 for details.
Past DE Articles
